Using Github and Github Codespaces
Contents
2.2. Using Github and Github Codespaces#
We will go through how to get set-up in class. This means signing-up for a Github account, accessing assignments (i.e. forking repositories) via Github Classroom, working on these assignments in Github Codespaces, and then, finally, submitting your assignments back to Github Classroom using git commands.
2.2.1. Accepting assignments in Github Classroom#
Here are the basic steps.
Sign-up for a Github Account: https://github.com/signup. Use your Elon email address.
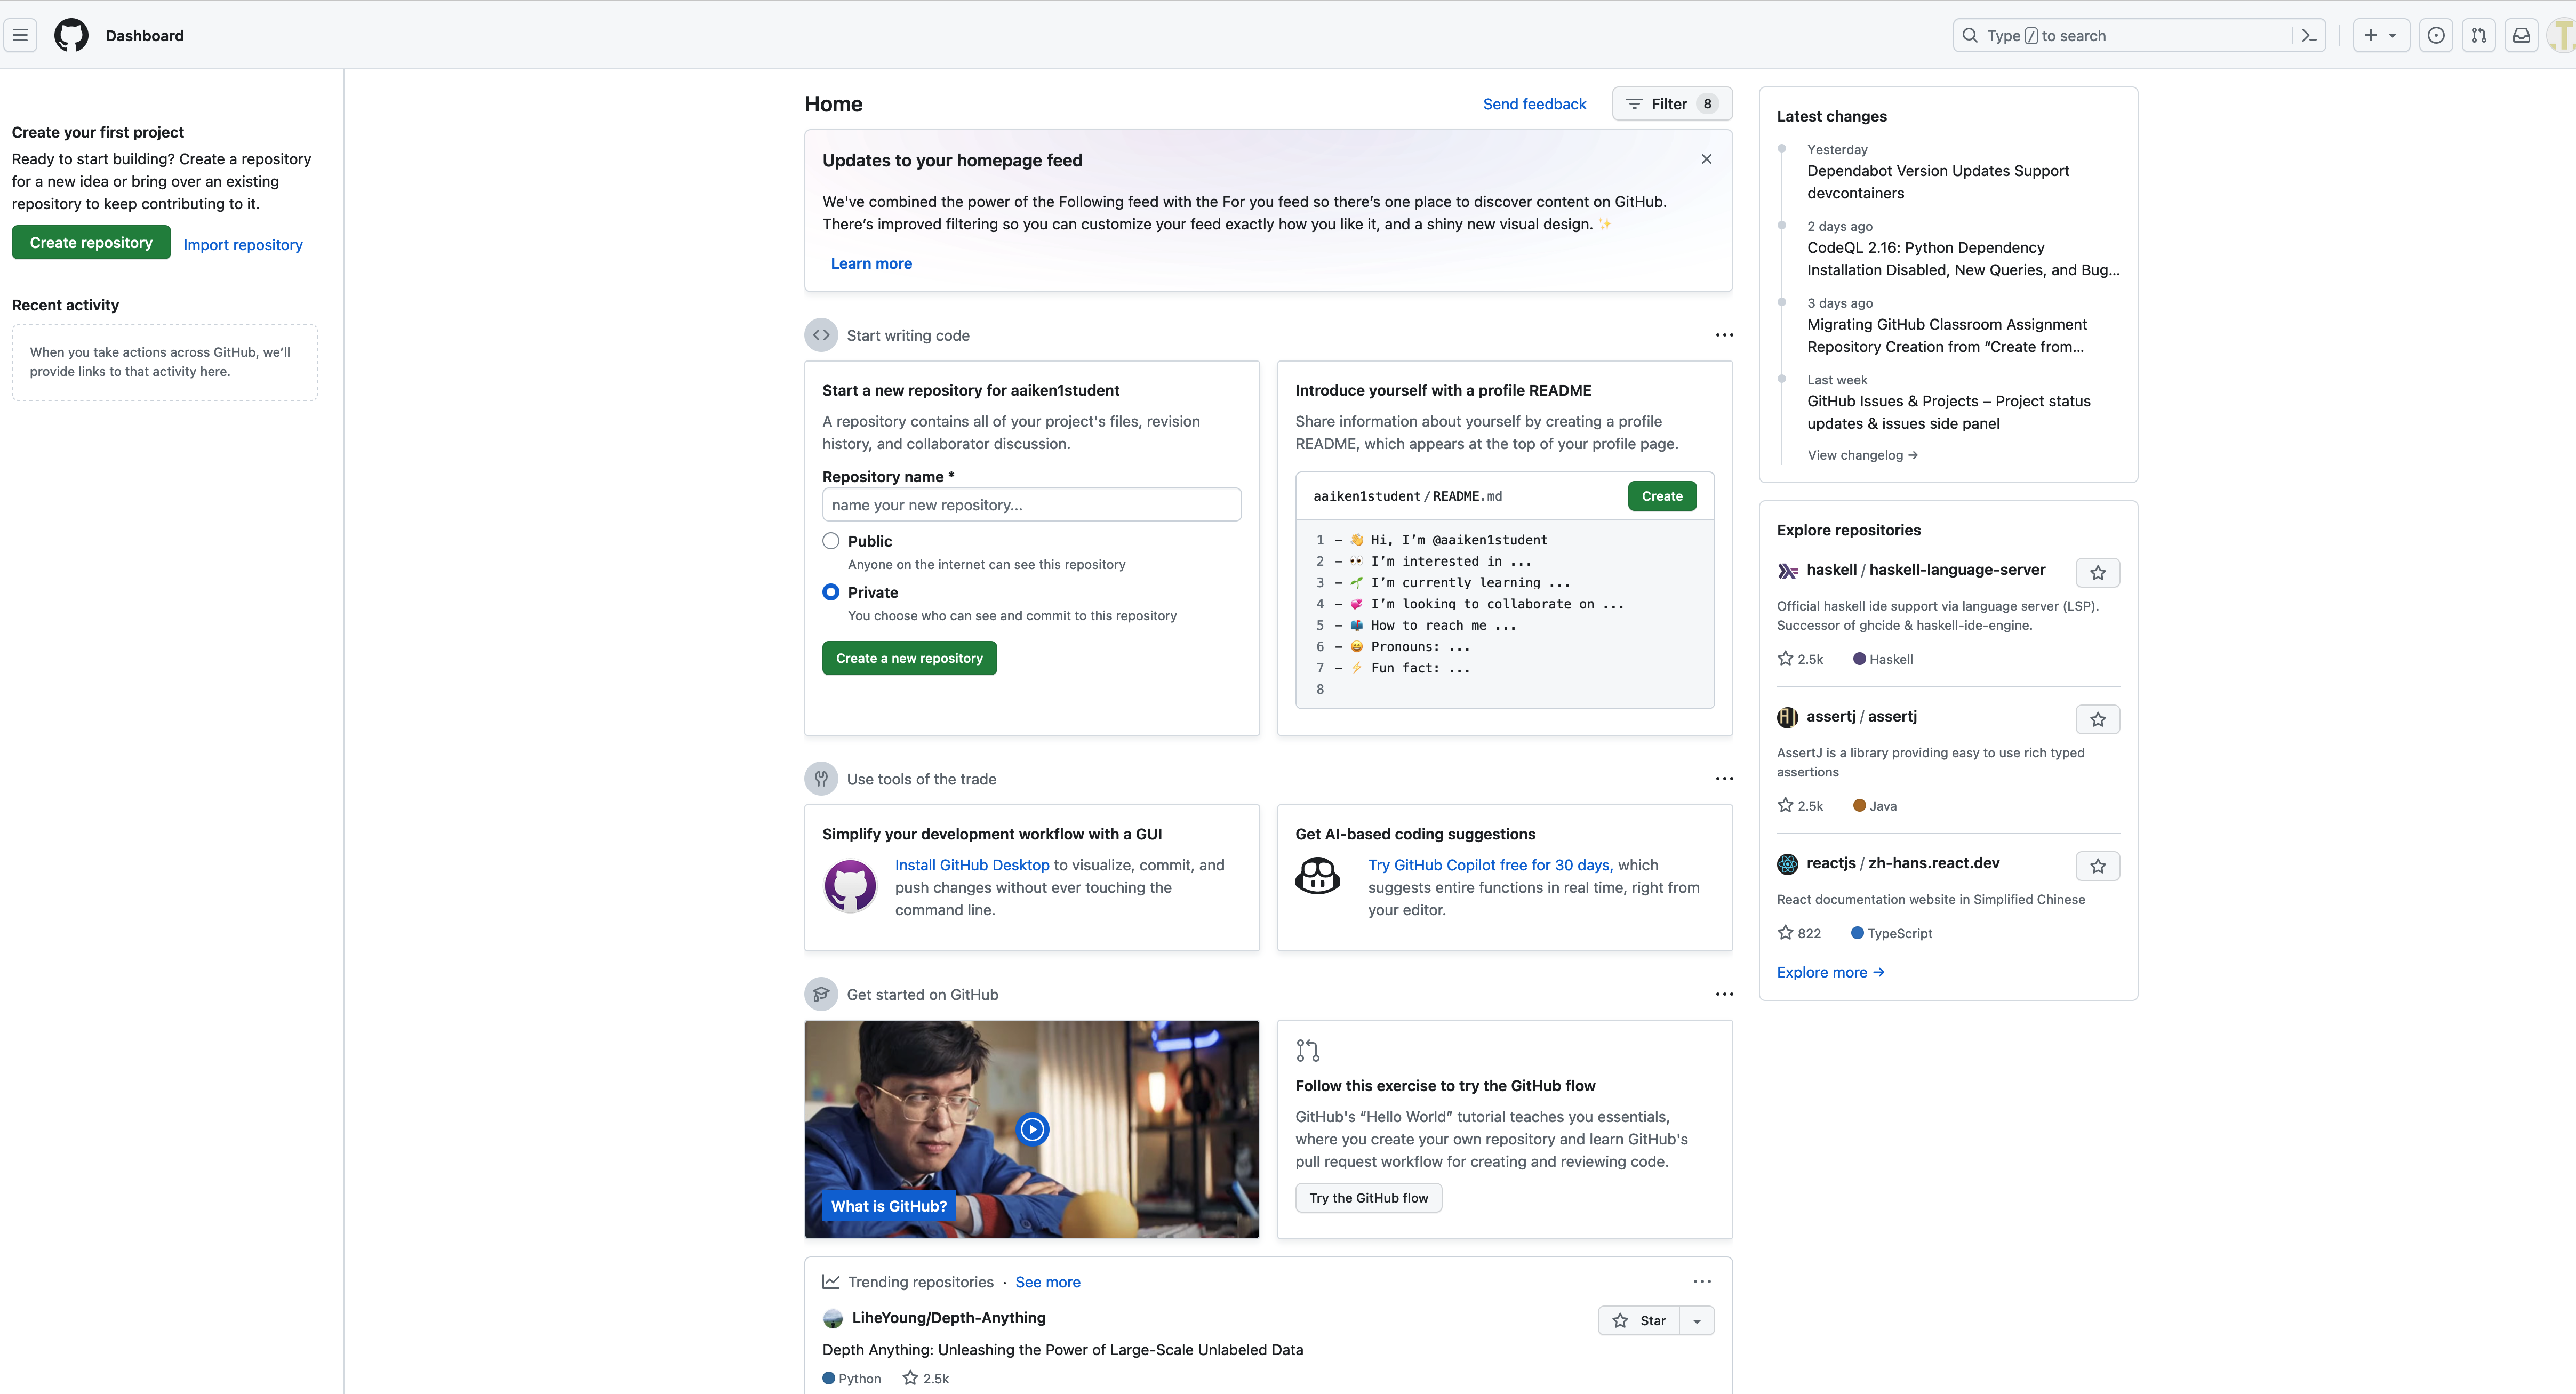
Fig. 2.1 Your main Github page with your repositories.#
Go to Moodle and find the link for Lab00. You might need to copy and paste it into your browser.
This is the lab to help us get started. You’ll be asked to find your name from the class roster and then link your Github account to our Github Classroom. Github Classroom is how you will access and submit assignments and is called ** elon-fin-data**.
When you accept an assignment, you’ll fork (copy) the repository (folder) with that assignment. You’ll then work in this new repository, which will be linked to your Github account. For example, you’ll see a new repository named something like lab00-getting-started-git-aaiken1student, where you’re Github username will replace my name.
These are ideas from git, which is used for version control. More on that in a second.
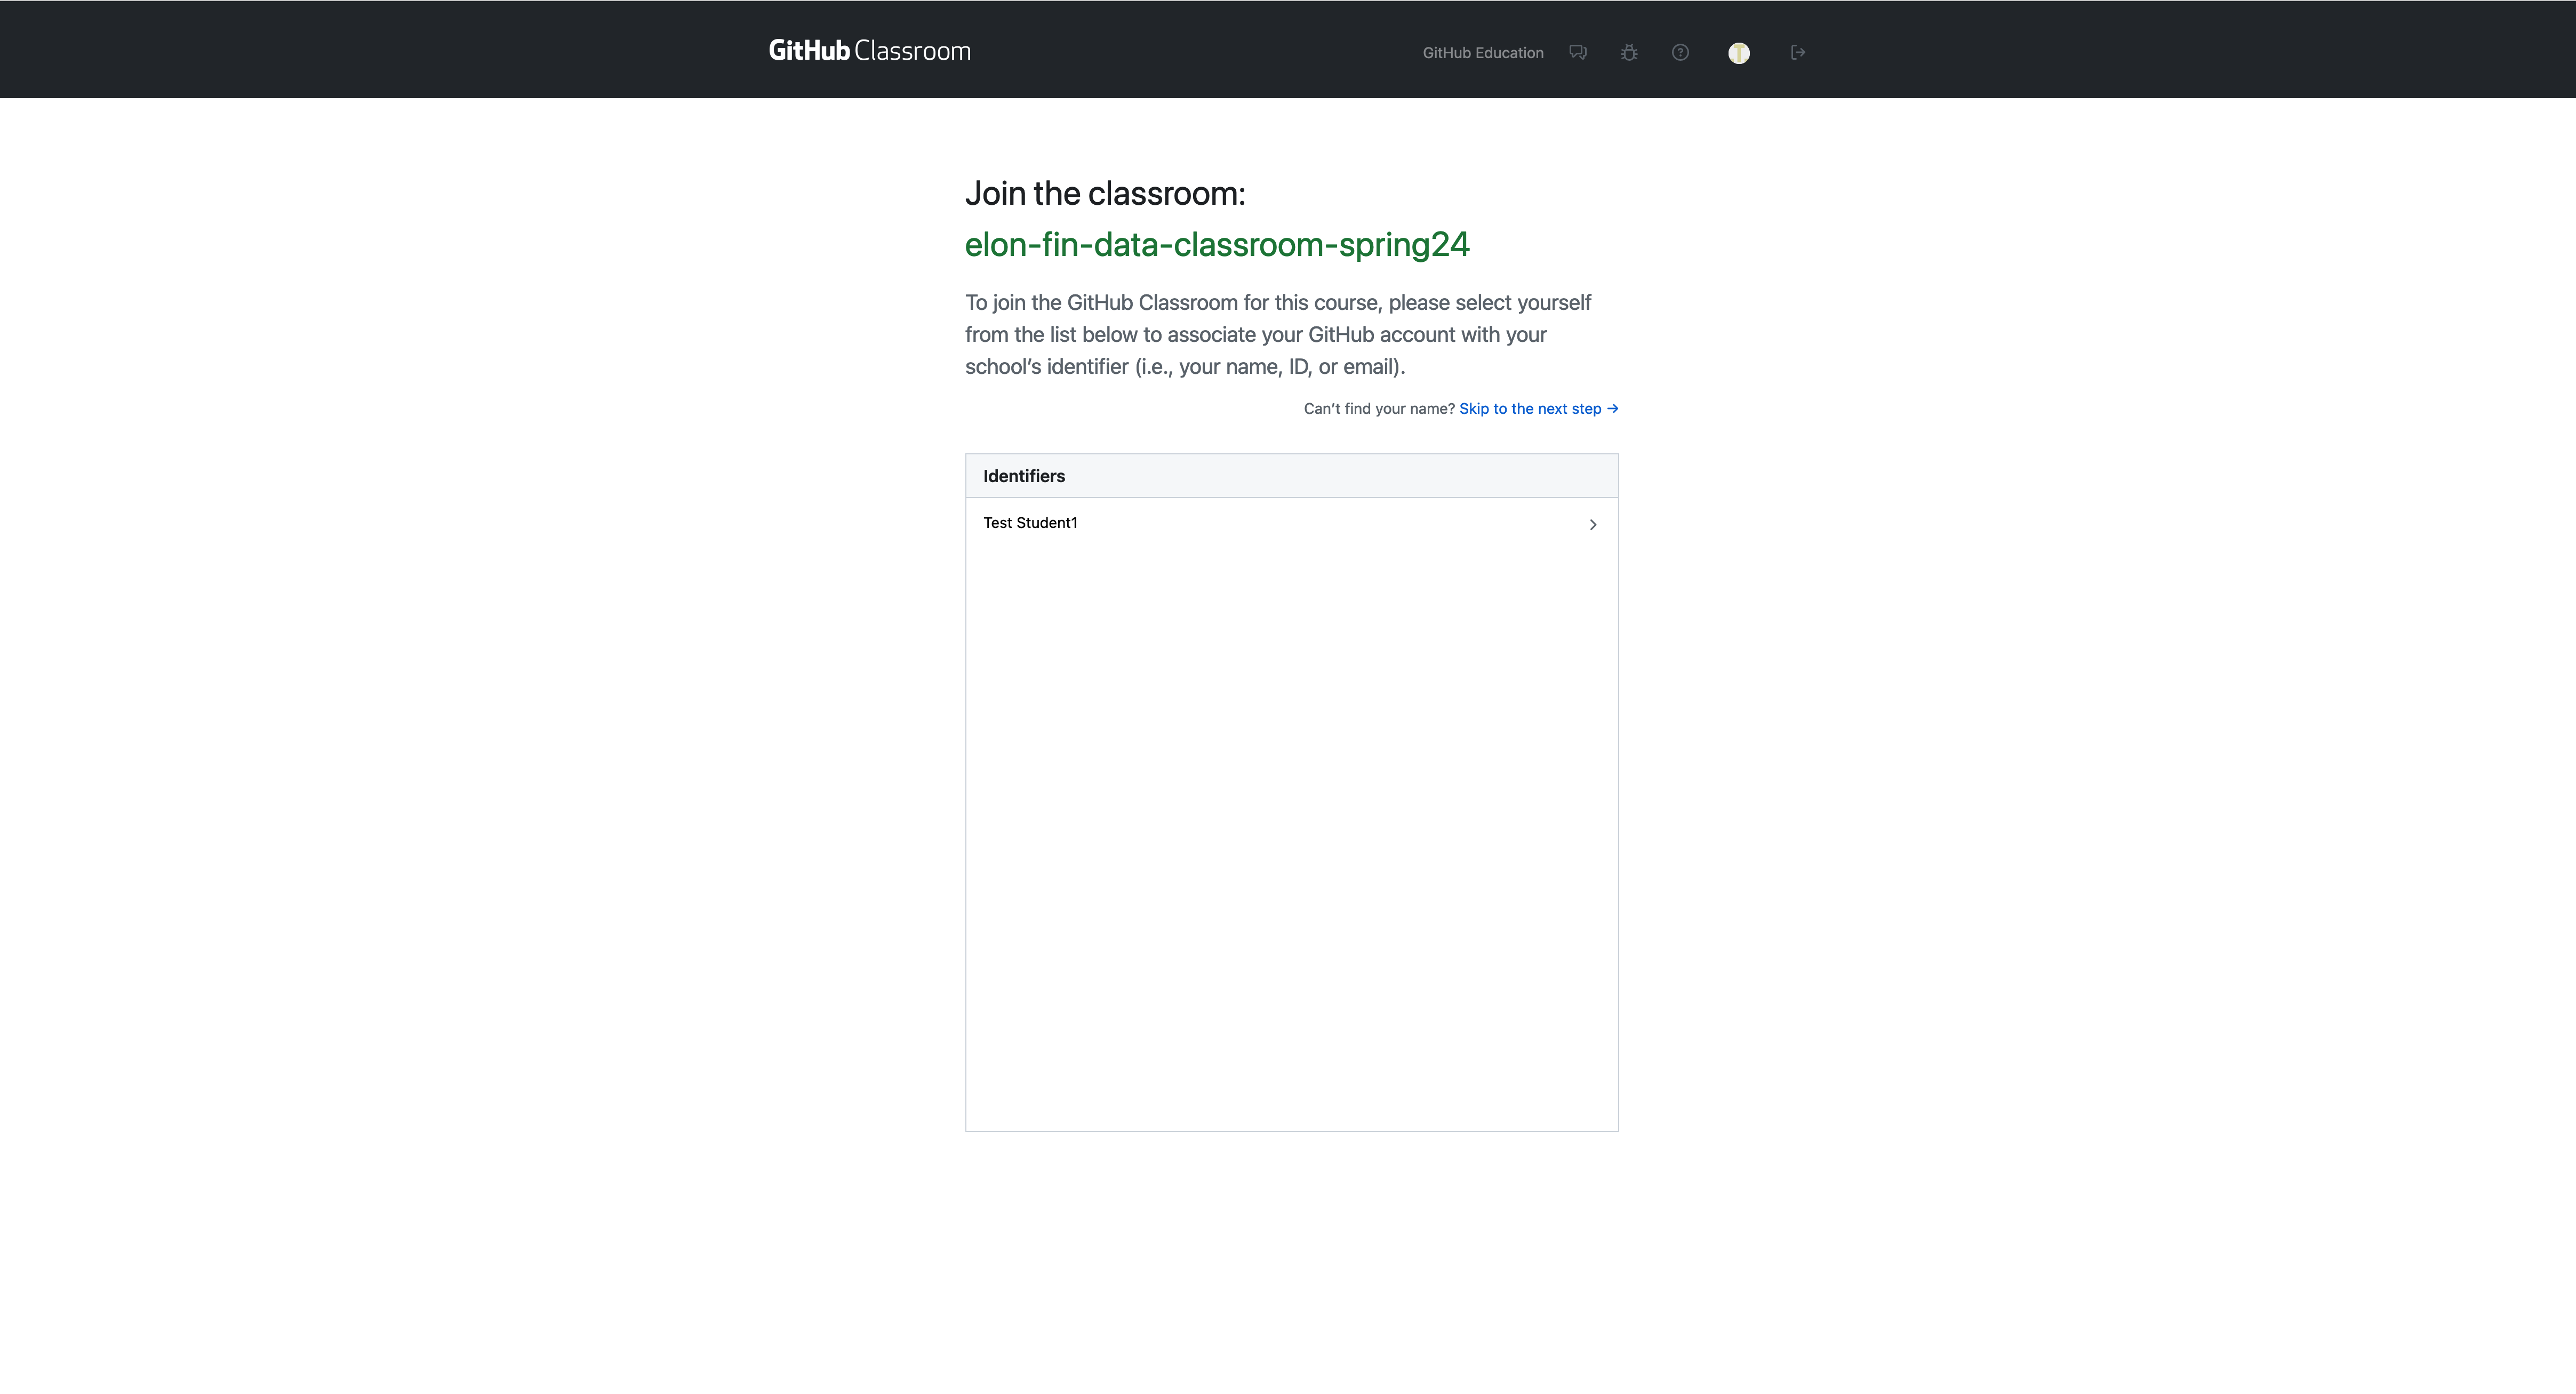
Fig. 2.2 You’ll see a list of everyone in the class when you first access an assignment. You’ll need to link your Github account to the username in Github Classroom.#
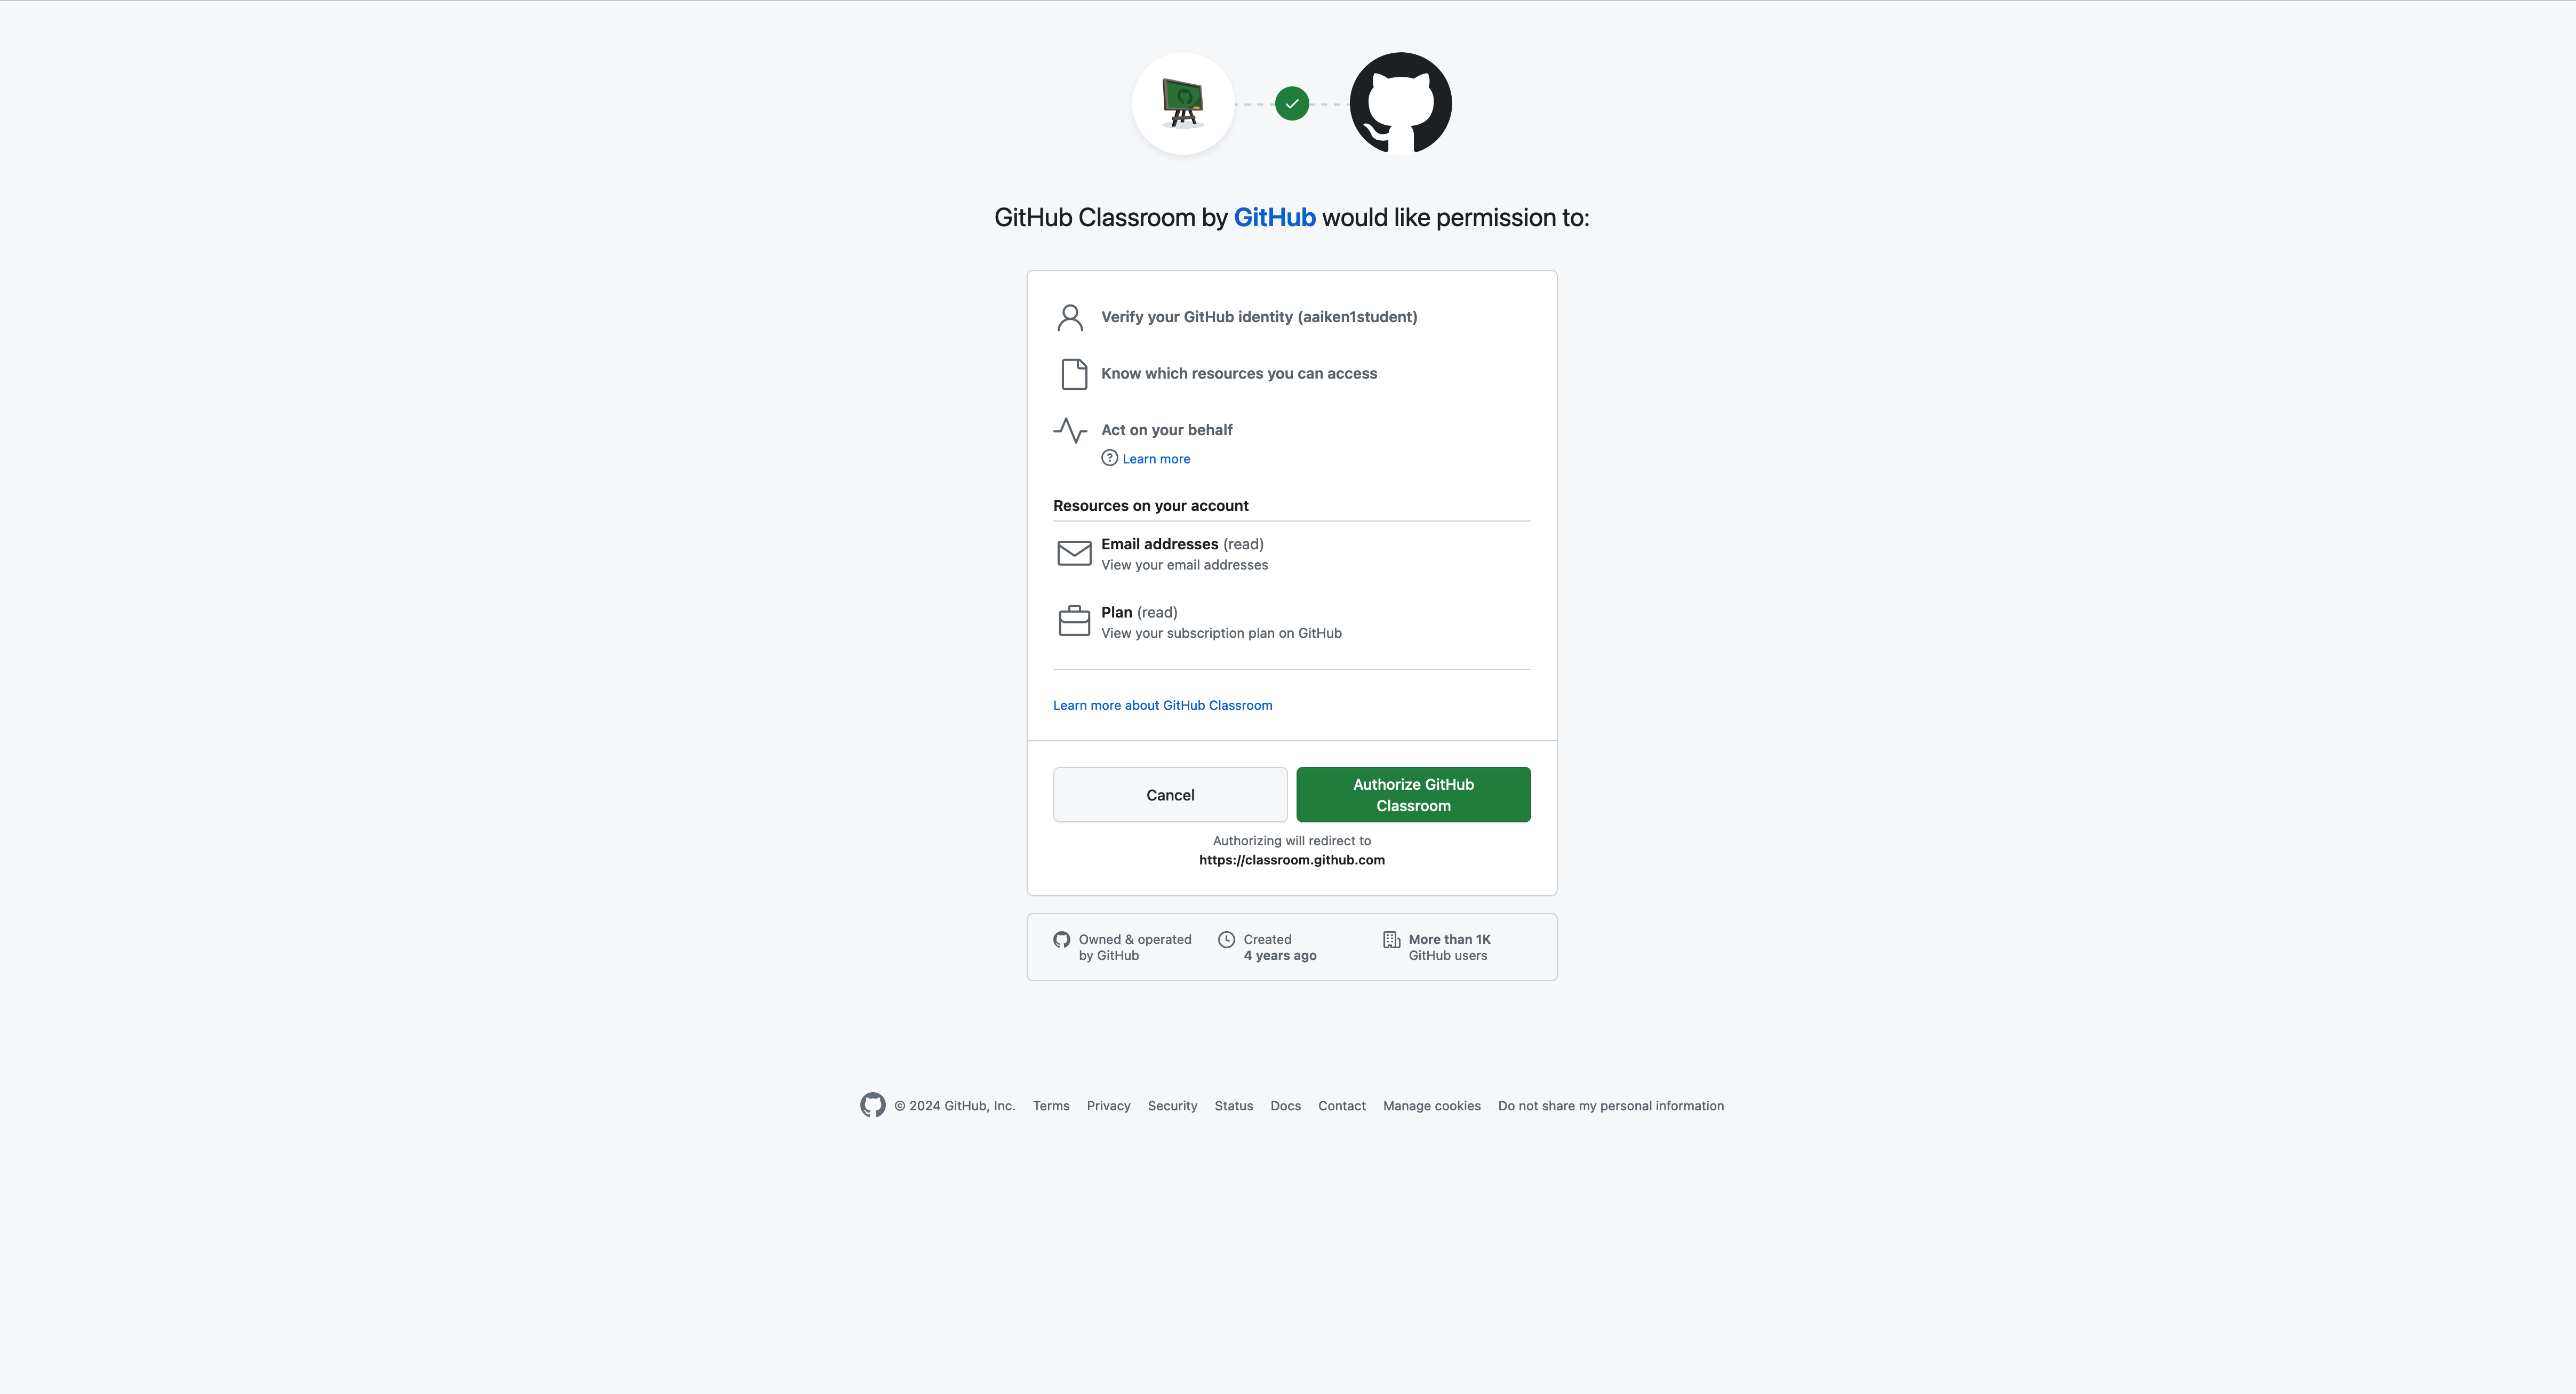
Fig. 2.3 Link my Github Classroom to your Github account.#
This repository will have the assignment file and anything else that you might need. Note that you may have to refresh your browser in order to finally accept the assignment.
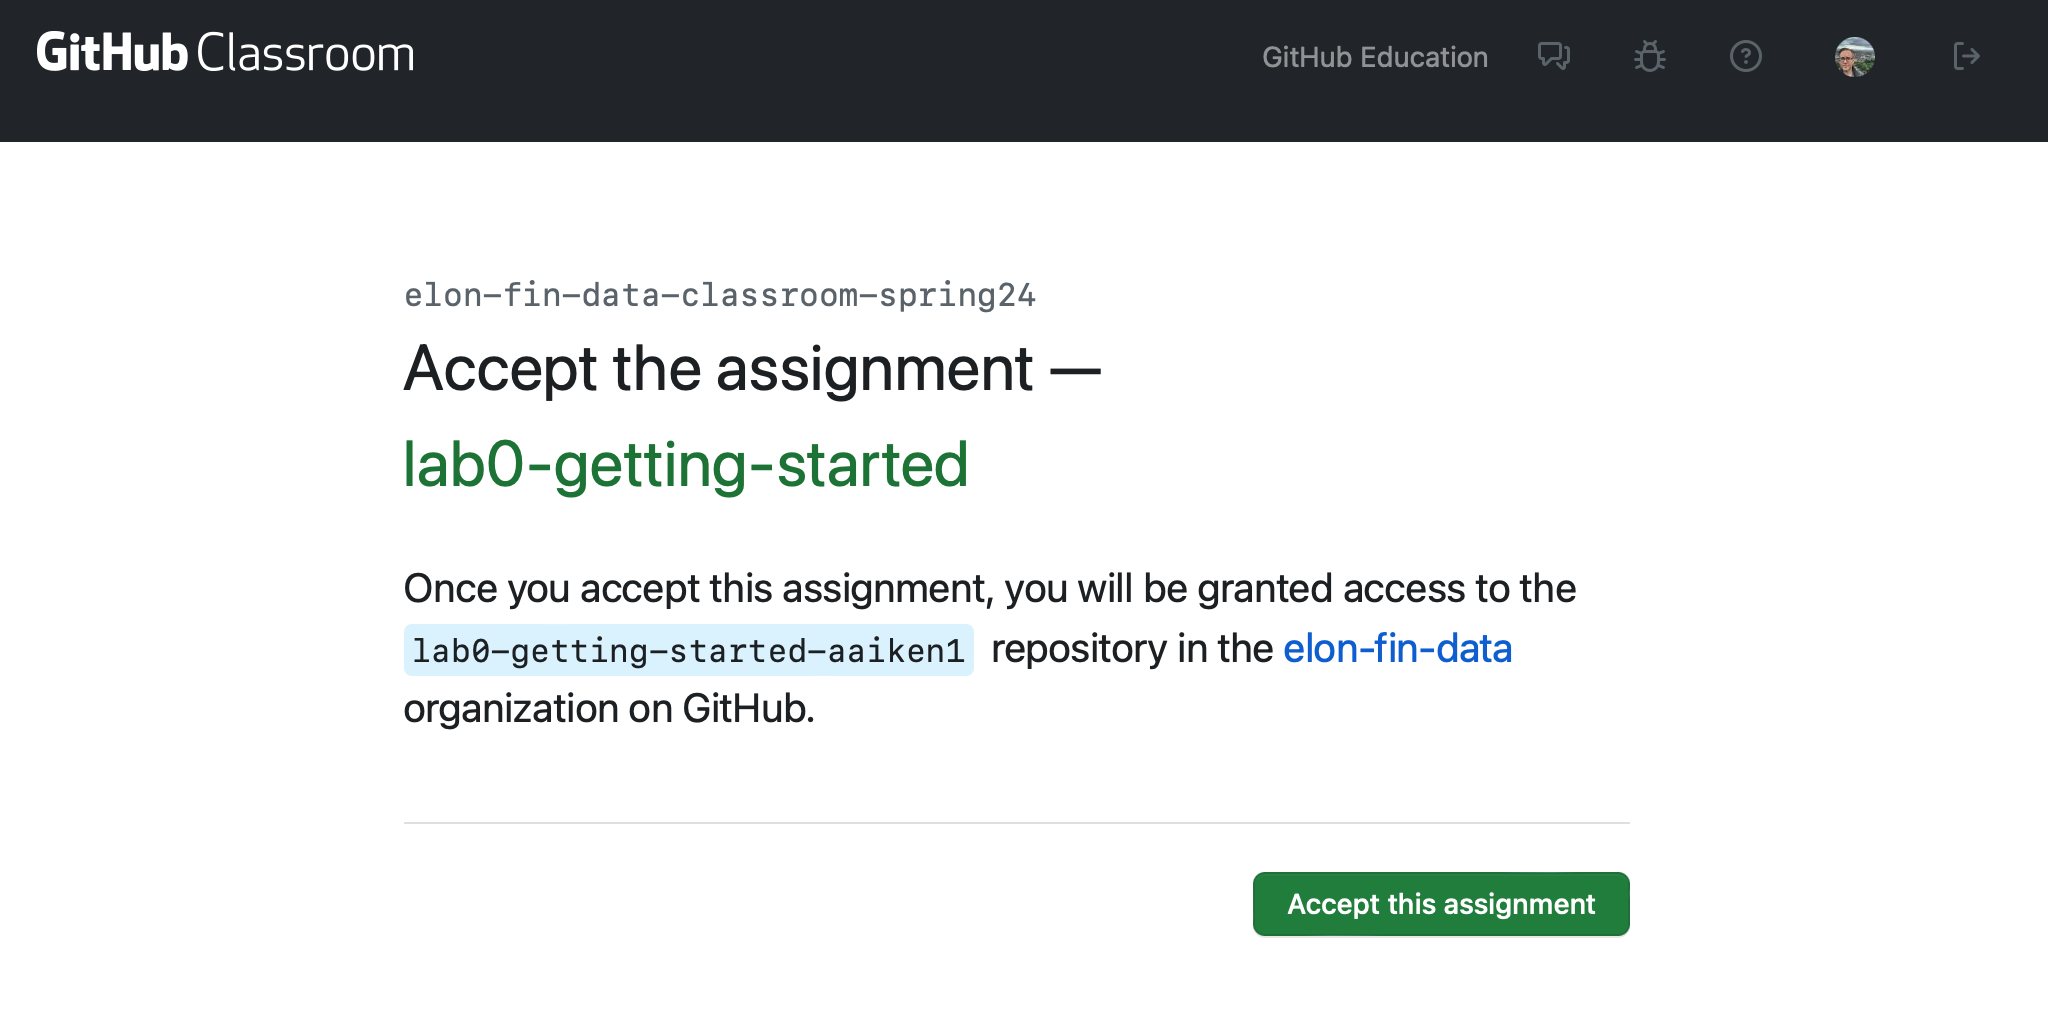
Fig. 2.4 You’ll accept the assignment to fork the repository.#
Since this repository is part of Github Classroom, I’ll be able to see your code as you work. No need to email files back and forth like an animal!
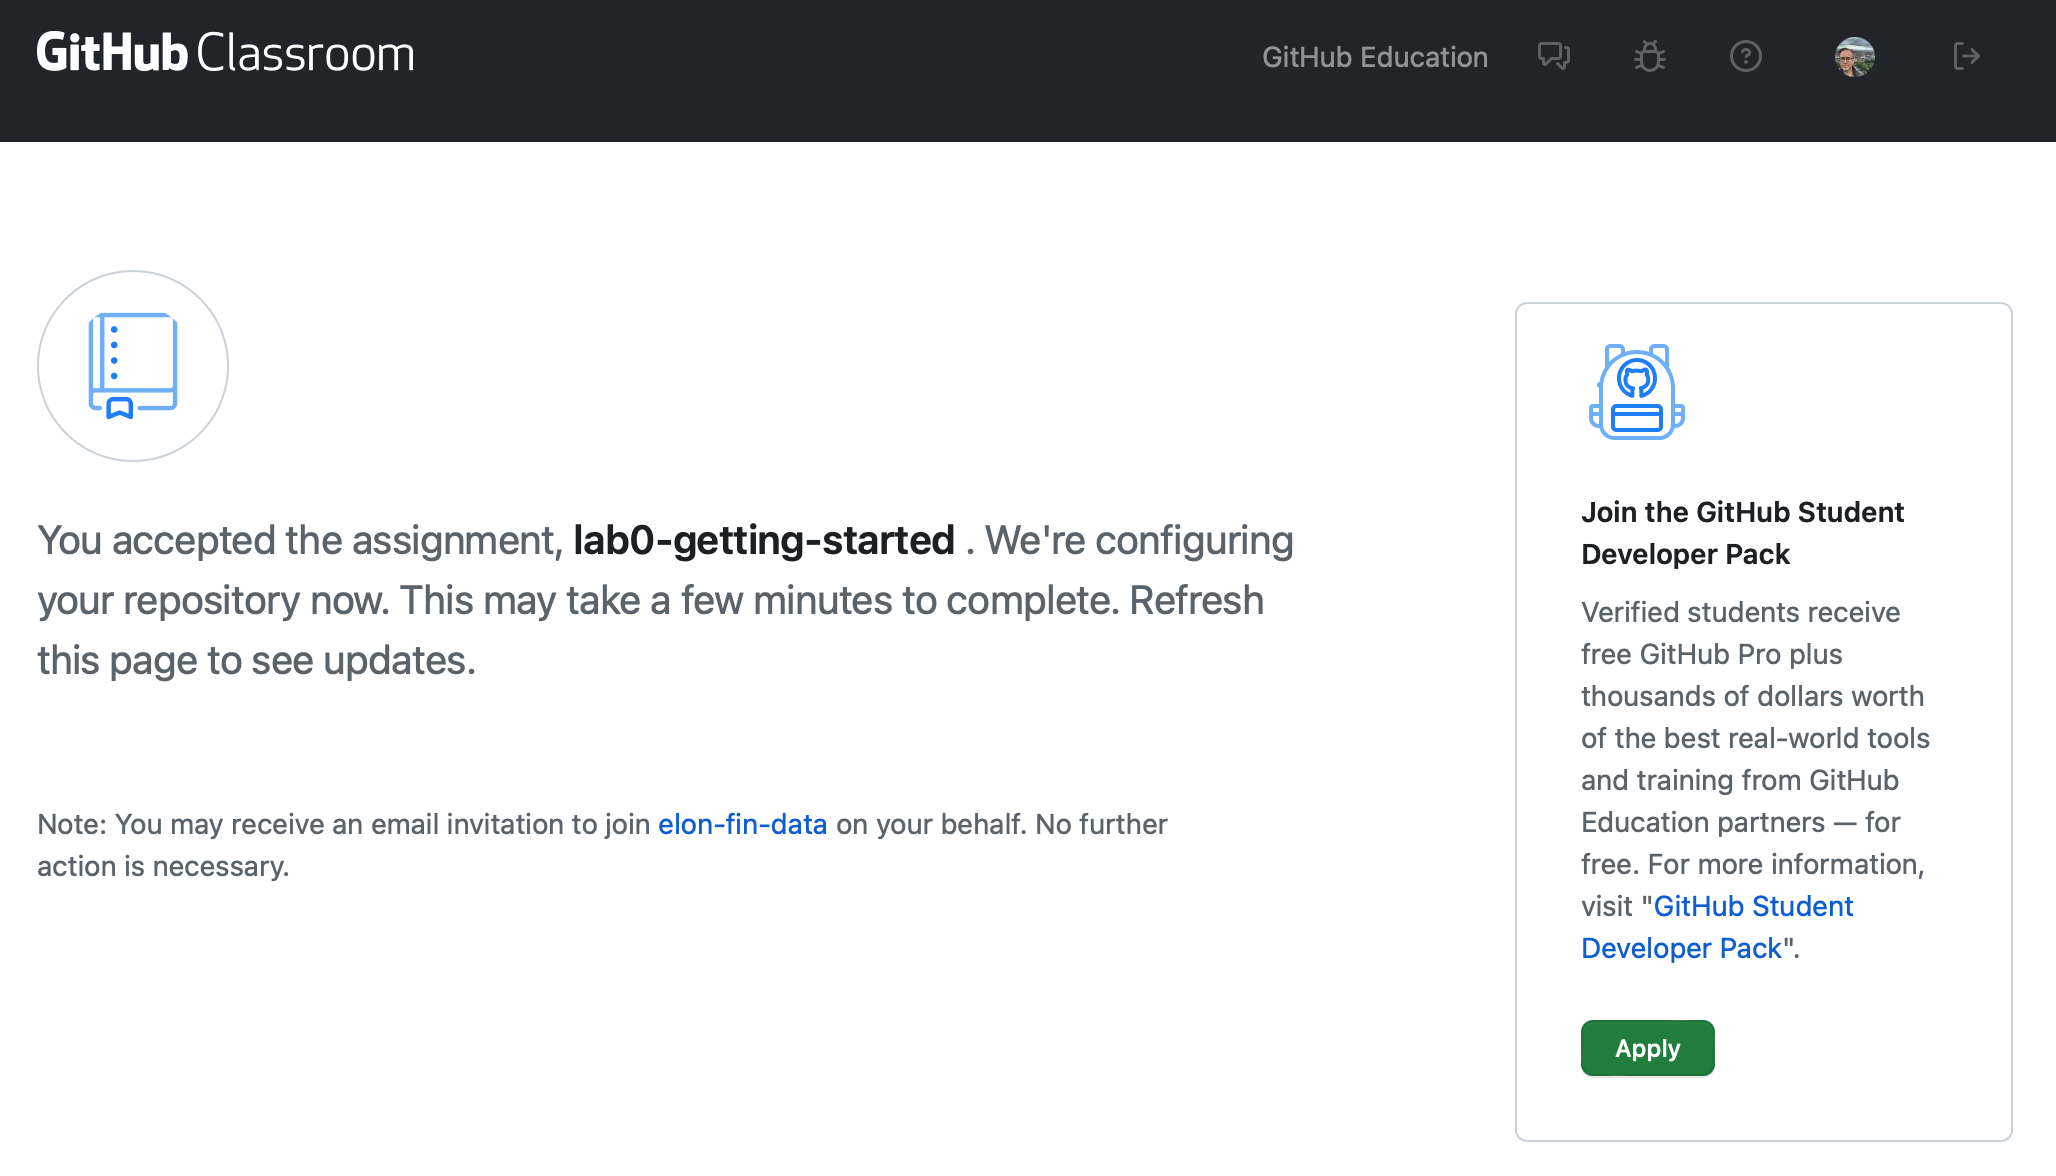
Fig. 2.5 You’ll need to refresh your browser to complete the process.#
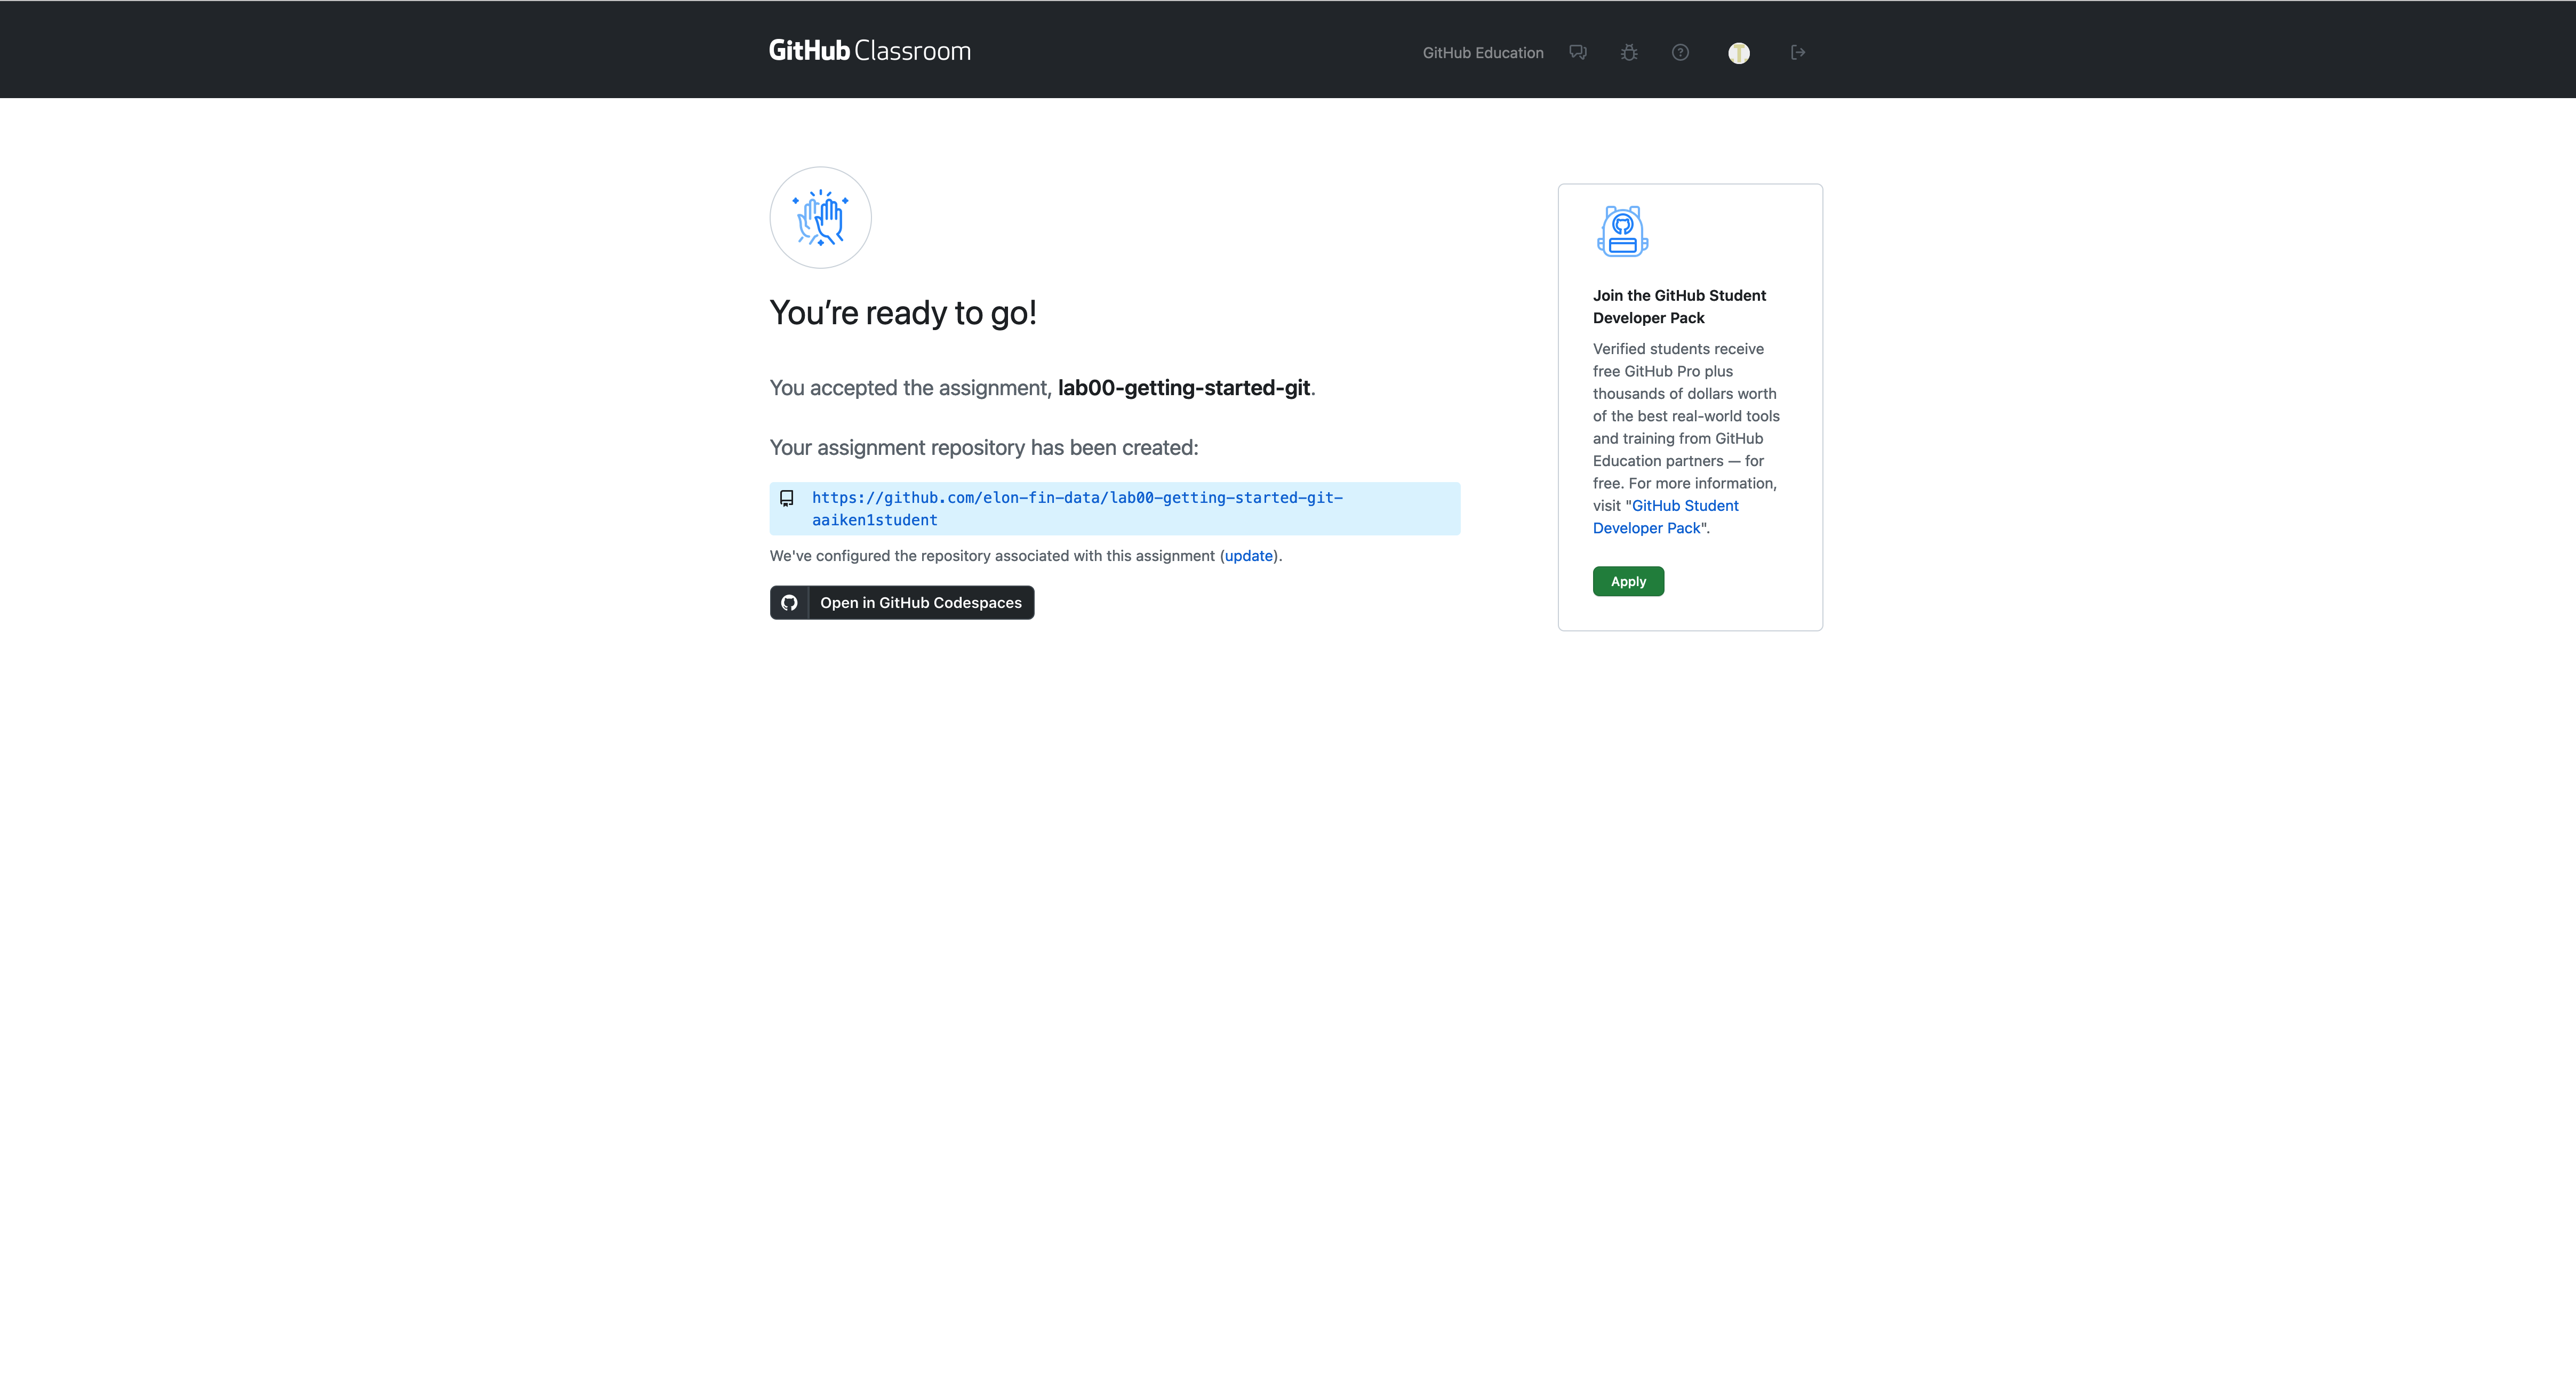
Fig. 2.6 Ready to go after a browser refresh. You see the URL for the new repository that you’ve created using the assignment.#
Now that you’ve accepted the assignment, it is time to get to work! Browse to your assignment repository (repo).
I have created a Youtube video that shows you some of the basics of how a repo works: https://www.youtube.com/watch?v=MOevORafn-g.
This assignment repo is your own, personal copy of the assignment. All of your work for that particular assignment is going to be stored in that folder on Github. But, I might go and update the assignment! What happens to your copy? You can synch fork to make sure that you have latest assignment. There will be a message at the top of the repo if you are out of synch.
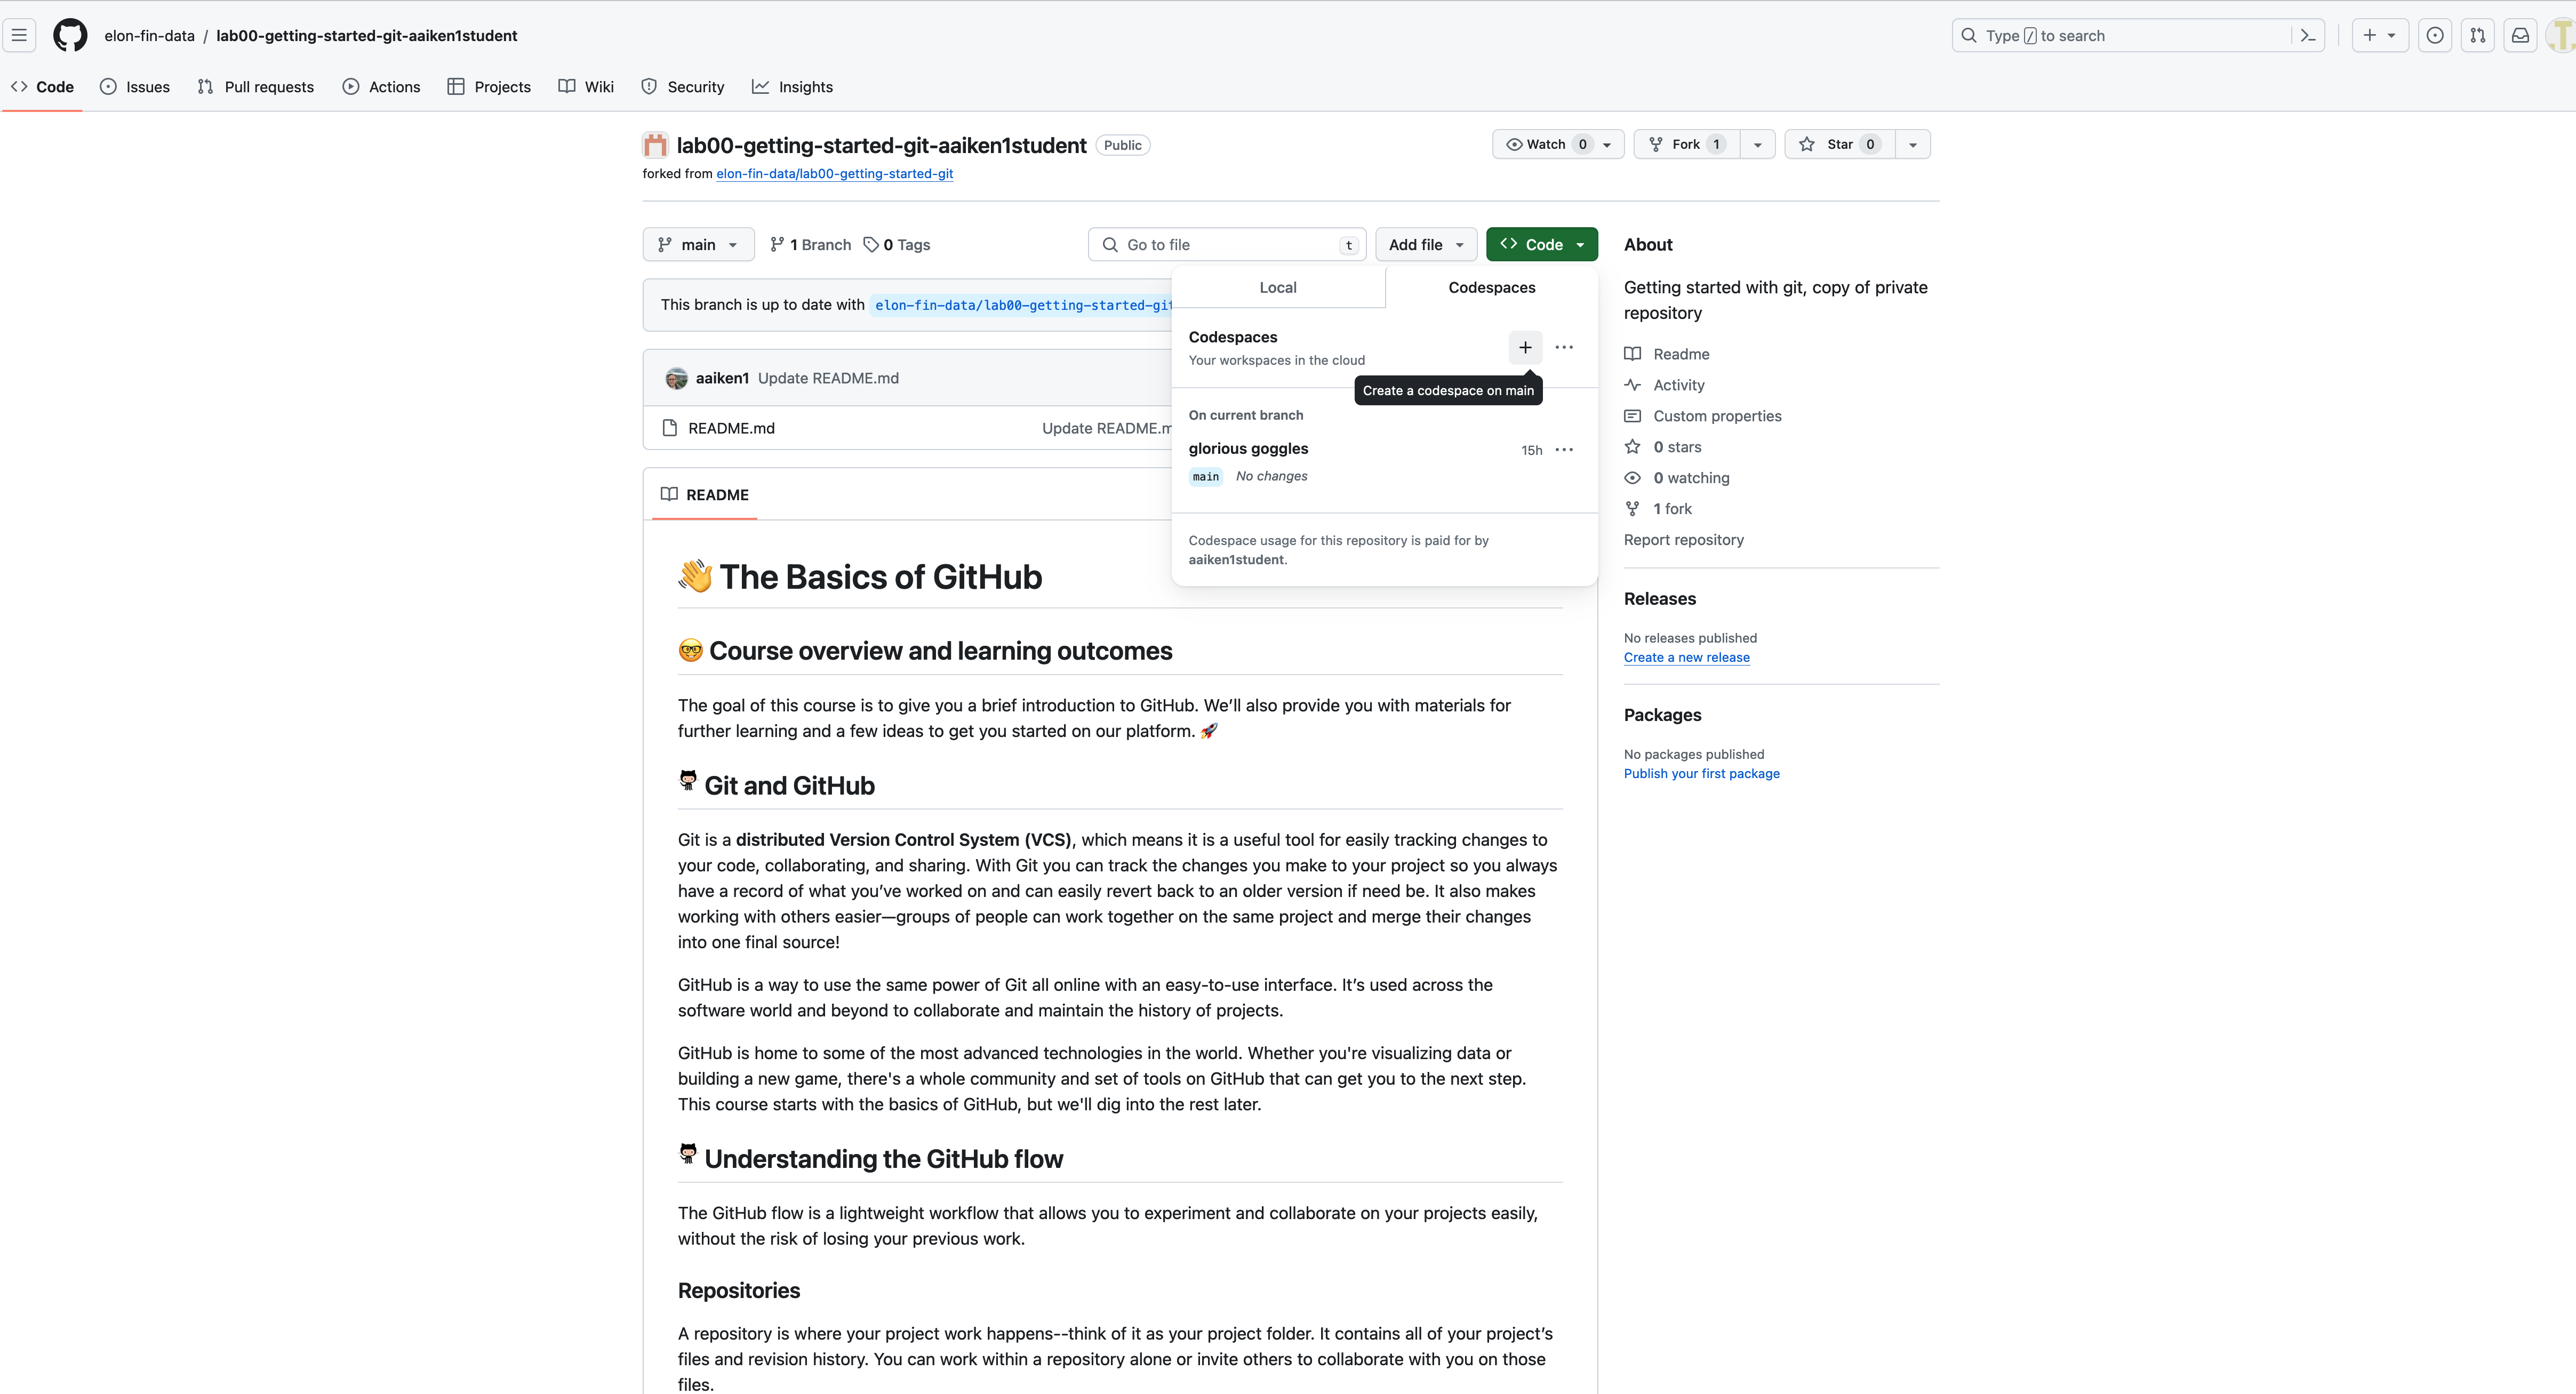
Fig. 2.7 You can open up a Github Codespace from the assignment repo.#
2.2.2. Using Github Codespaces#
Now, you can open up a Github Codespace. Codespace is essentially VS Code, but in the cloud, running on Github (i.e. Microsoft) servers. You get a certain number of hours of runtime for free each month. It should be more than enough for the work that we’re doing in this class.
I have also created a video that shows you a bit about using Codespaces: https://www.youtube.com/watch?v=VUHuEXTne6Q
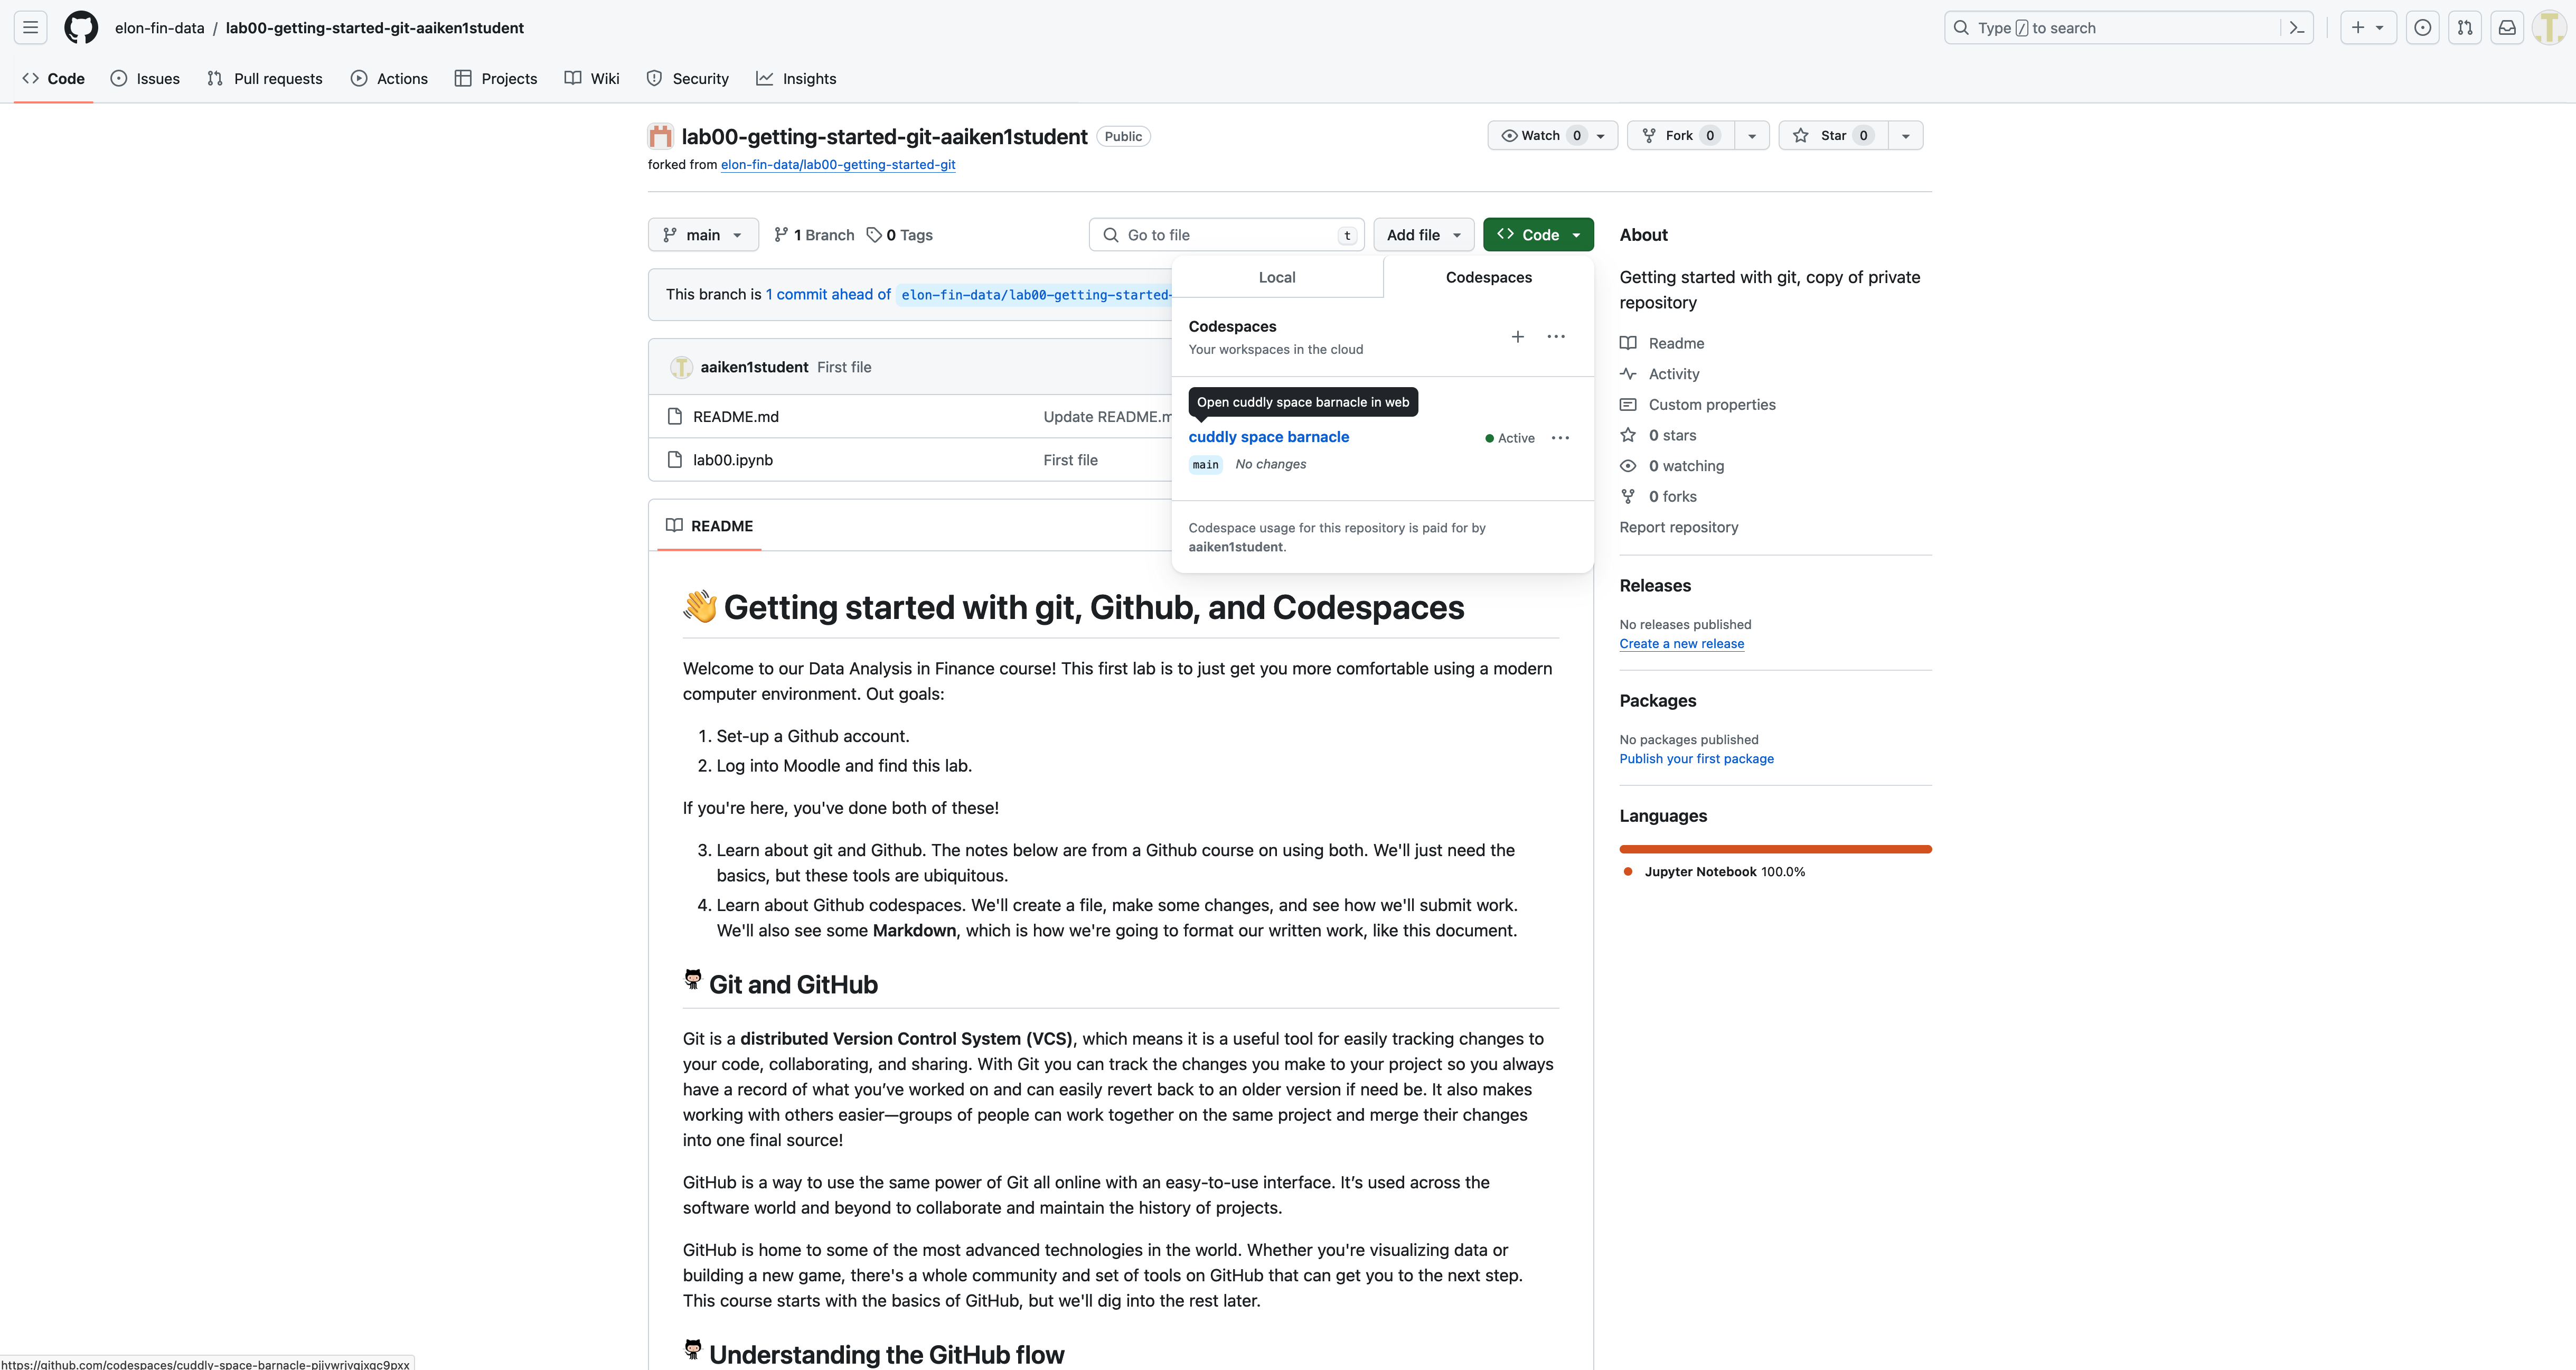
Fig. 2.8 After you’ve done some work and followed the git steps to synch (or push) your files, you’ll see them appear in your repository.#
I’ll be able to see you committing and pushing files to your repositories, since the assignment repositories live in the elon-fin-data Git Classroom.
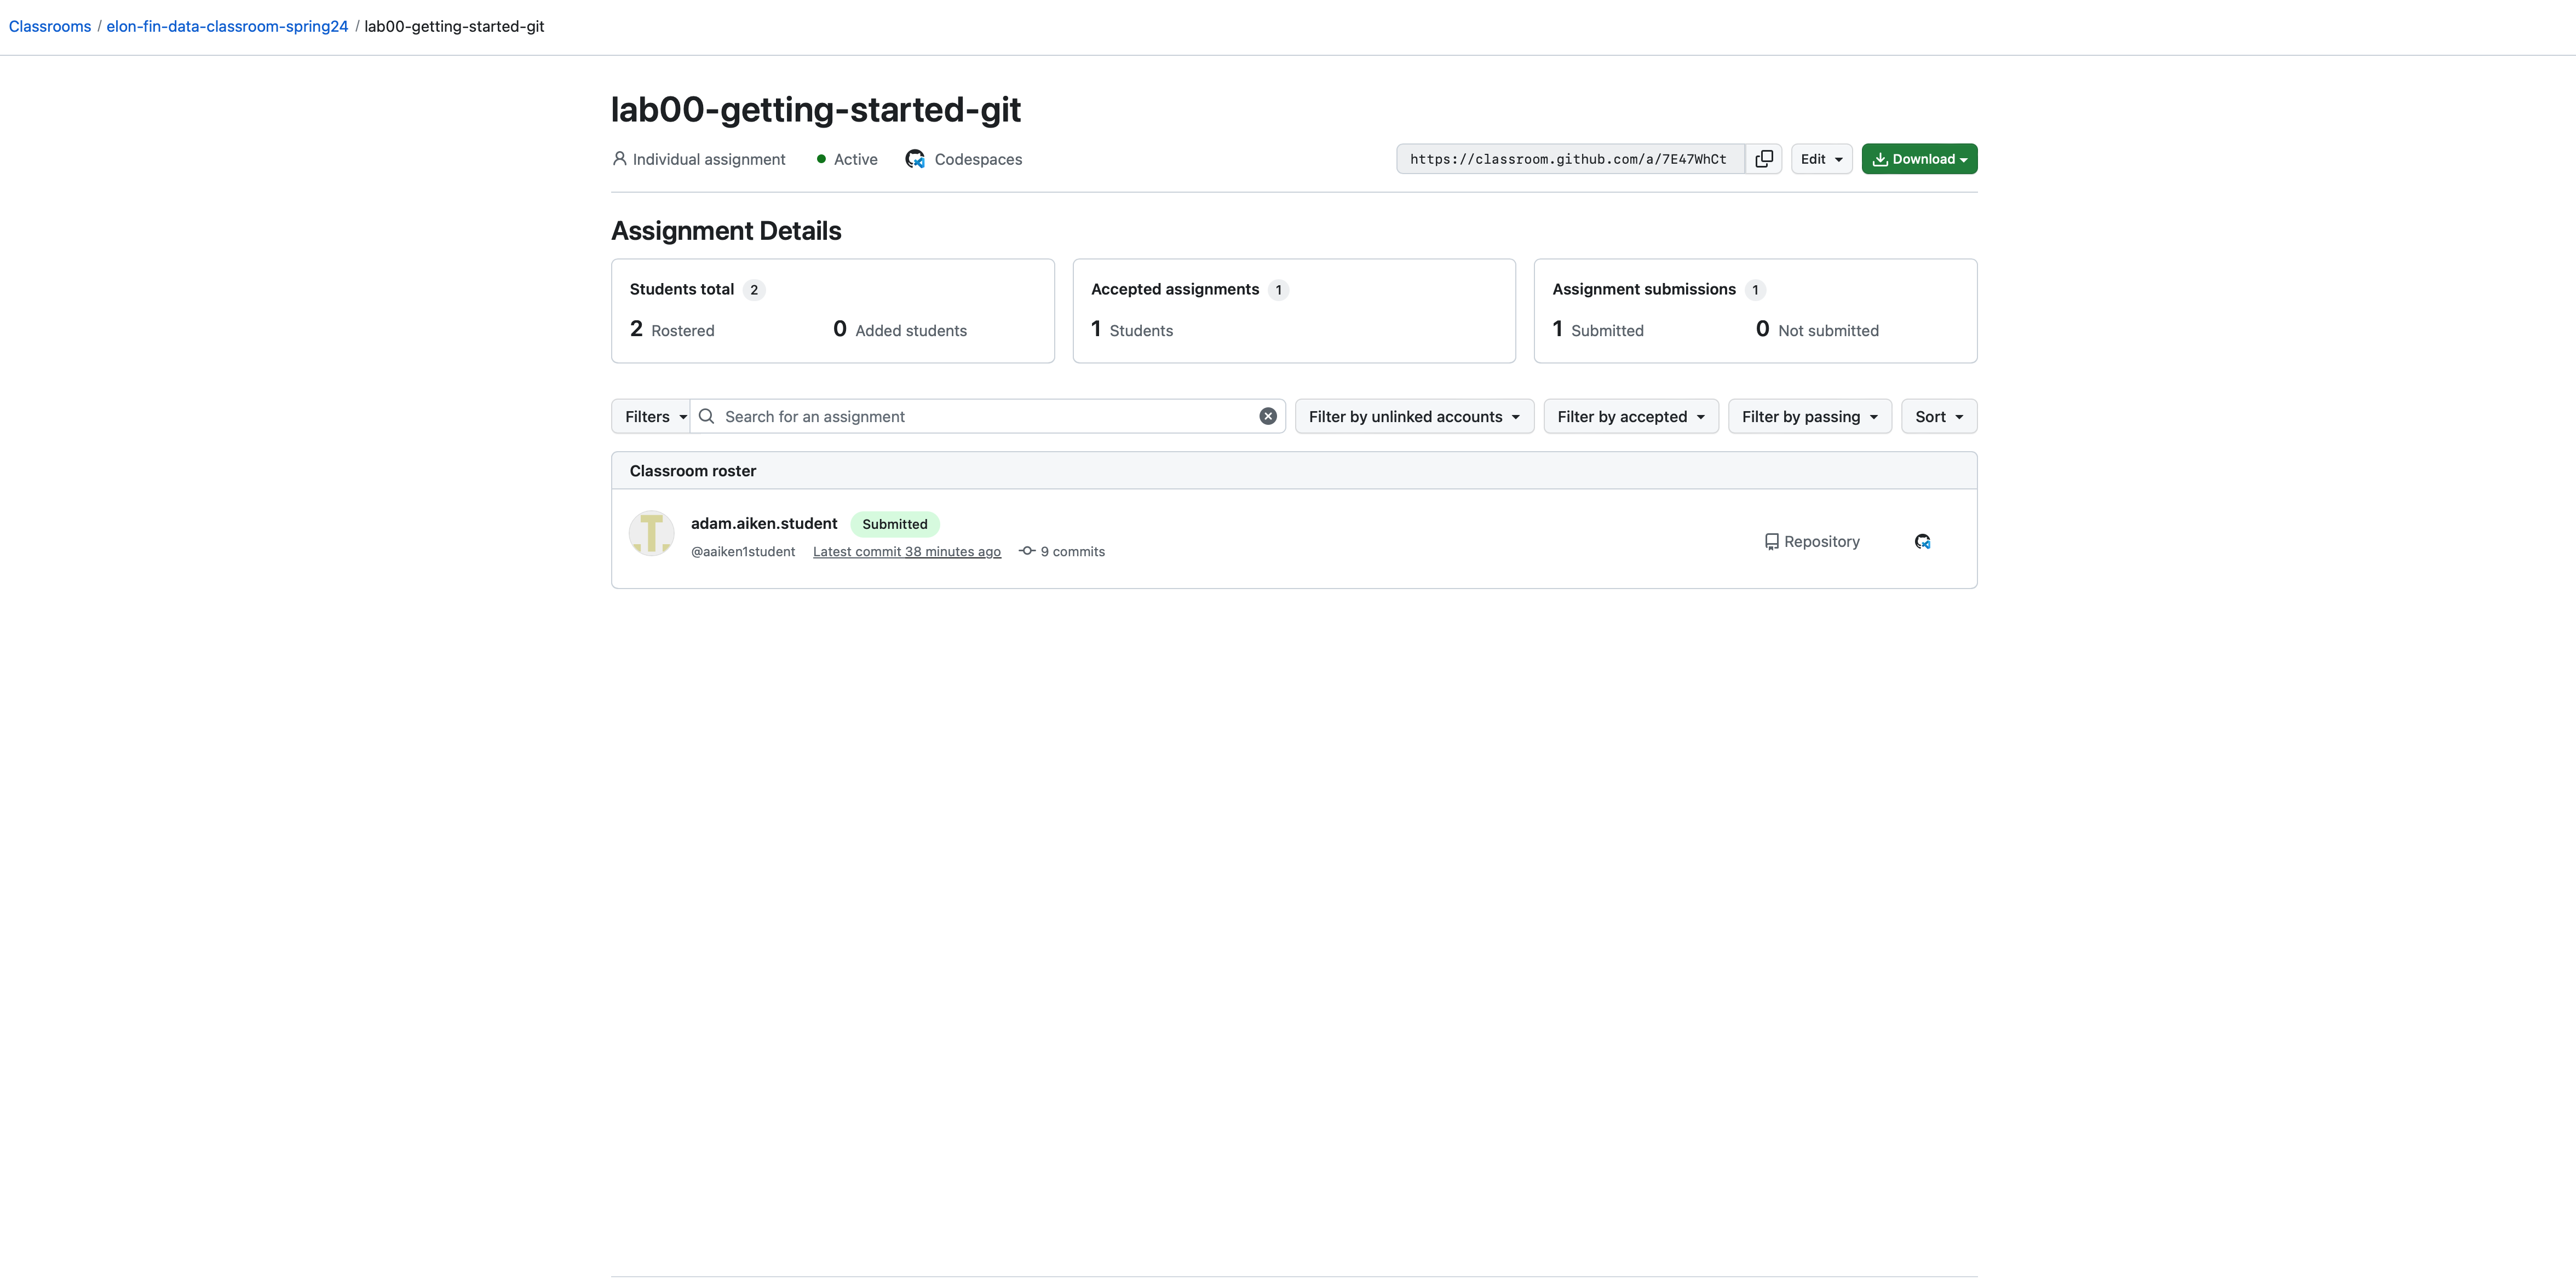
Fig. 2.9 This is what I see on my end for each student and each assignment. I can see your number of commits and your latest work.#
You can create new Codespaces, as well as see all of you recent ones by going to the main Codespace page: https://github.com/codespaces/.
Notice that Codespaces can be associated with repositories. You can also just create new ones and start working on something. Github provides some ready-made templates, like the Jupyter Notebook one.
Back to our assignment repository. To get going, you’ll need to tell Codespace that you want to work in Python. This means navigating to Extensions on the left. You’ll search for and install Python and Jupyter Notebooks.
Codespaces is just VS Code in the cloud. VS Code is a place to… code. But, what kind of code? Extensions tell VS Code all about Python and Jupyter notebooks. We’re going to write our code in these notebooks.
Once you have these extensions, you can actually create a notebook file. Go up to the command palette, that strip at the top of your window where you can type commands. Type > Jupyter. You should get an option to create a new Jupyter notebook. This will open up a blank notebook, where you can write Python code and Markdown, mixing code and text.
You can also go to the Explorer tab on the left, click the new file icon, and create a new file with an .ipynb extension. This file will start its life in the folder that you created it in.
when you create a notebook file, you might see Select Kernel over in the upper-right hand corner. The kernel is what actually runs your code. There are many different versions of Python out there. The version that we are using is on Github’s server. The version that I’m seeing in Codespaces is Python 3.10.13. Without a kernel selected, none of your Python code will work.
Once you have your working Jupyter notebook (.ipynb) file created, you can proceed like you would with a local install of VS Code. Load your data, do you analysis. You work will be saved in the Codespace instance associated with that repository.
As you go, you can add/commit/push your files to your repository to move them from the Codespace instance to your Github repository for that assignment. This will make them more “permanent”. As you do more work, you add/commit/push again to update.

Fig. 2.10 The main page for Github Codespaces. You can create a new codespace, as well as see recent ones that you’ve worked in.#
I found this video to be helpful in explaining how to navigate Codespaces: https://www.youtube.com/watch?v=kvJf8s18Vr4. Don’t worry about all of the coding, yet. We just want to get a sense of how this environment works.
2.2.3. Using git to submit your work#
Both above and in our class videos, I mention add/commit/push. These are examples of git commands. Git is a framework for doing version control. In other words, keeping track of files and file changes. This is actually a tough problem! Most software development of any kind is being done by multiple people in different places. Someone might want to add a new feature, but you don’t want to break the entire project. How do you keep track of everything? Git lets us do that.
Github is a particular “flavor” of git and is owned by Microsoft. You can use git at the command line of your computer, typing in different commands. You can also “point and click”. In my videos, I show you some point and click methods.
There are a million git and Github tutorials around. We just need to know the basics to keep track of our files and to work together. It’s kind of like using Google Docs (kind of!), but going to the next level.
Here’s an intro video discussing what Github is: https://www.youtube.com/watch?v=pBy1zgt0XPc.
This is the best introduction that I’ve found: https://aeturrell.github.io/coding-for-economists/wrkflow-version-control.html. All of material in this book is great for this class.
This is another nice overview, also geared towards Masters-level data science/economics students: https://github.com/tyleransom/DScourseS24/blob/master/LectureNotes/03-CLI-Git/git_tutorial.pdf
This playlist has some good videos describing git and Github. They are part of their educator training series: https://www.youtube.com/watch?v=uWsXEmaM3PA&list=PLIRjfNq867be7VngMuXsjTvzBM26nBINg&index=2.
Here are two videos on using git and Github with a local VS Code install: https://www.youtube.com/watch?v=i_23KUAEtUM and https://www.youtube.com/watch?v=CvUiKWv2-C0. We are going to mainly be doing things in Github Codespaces, but many of the ideas are going to carryover.
You’ll see how they are using bash commands in the terminal on a Mac. Windows has a similar command line. If you want to create your own repositories and get to work, watch these videos. By using Github Codespaces, with a repository created from each assignment, you can use the Codespace interface to do a lot of the same things. Codespaces does have a terminal interface, though, so you can also use the bash commands.
The important thing, though, are the git ideas. Version control. Repositories. Snapshots. Git add, commit, push. Readme files. These are the backbone of modern computing!
2.2.4. Create a Github repository for our class#
You can accept assignments from Github Classroom, which creates a personal repository for that assignment. You can work on that assignment in Github Codespace. You can use git to push your work in the Codespace back to the repository, where I can see it.
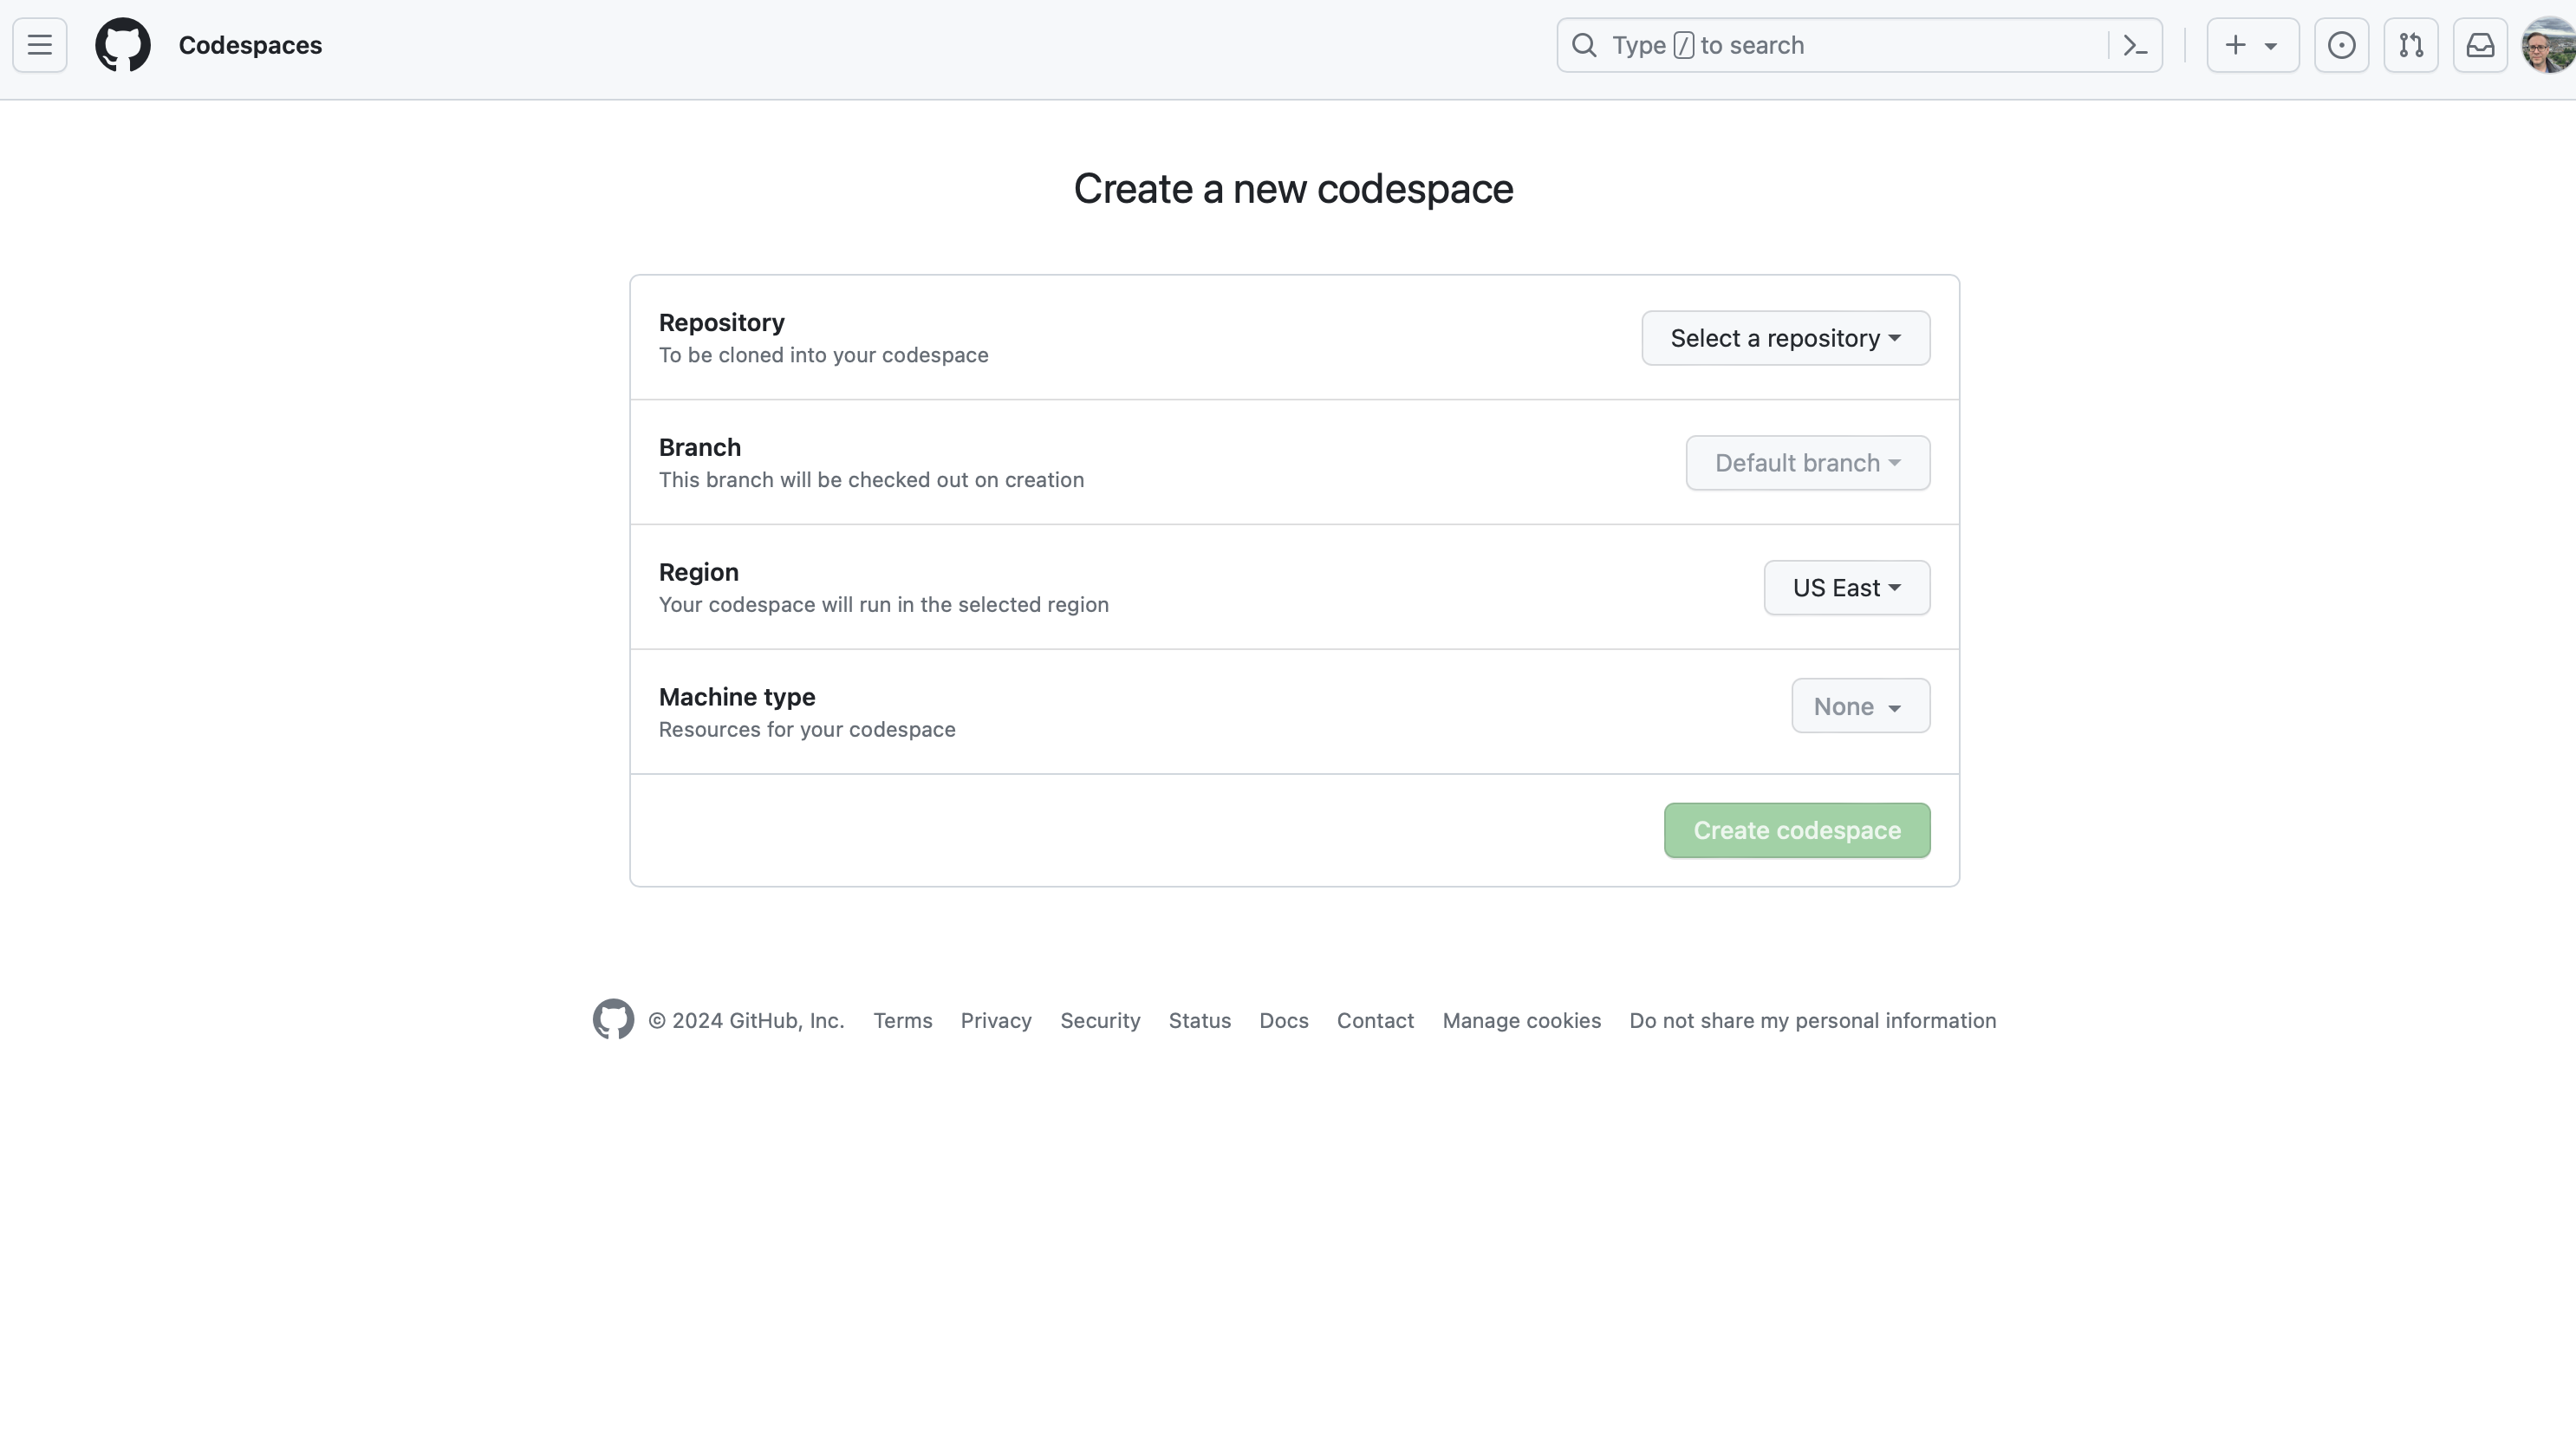
Fig. 2.11 Every codespace needs to live in a repository.#
But, what if you just want to code? Maybe we’re just coding together in class. When you try to create a new Codespace that is not related to one of our Github Classroom assignments, you’re asked to create the Codespace within a repository. Which repository?
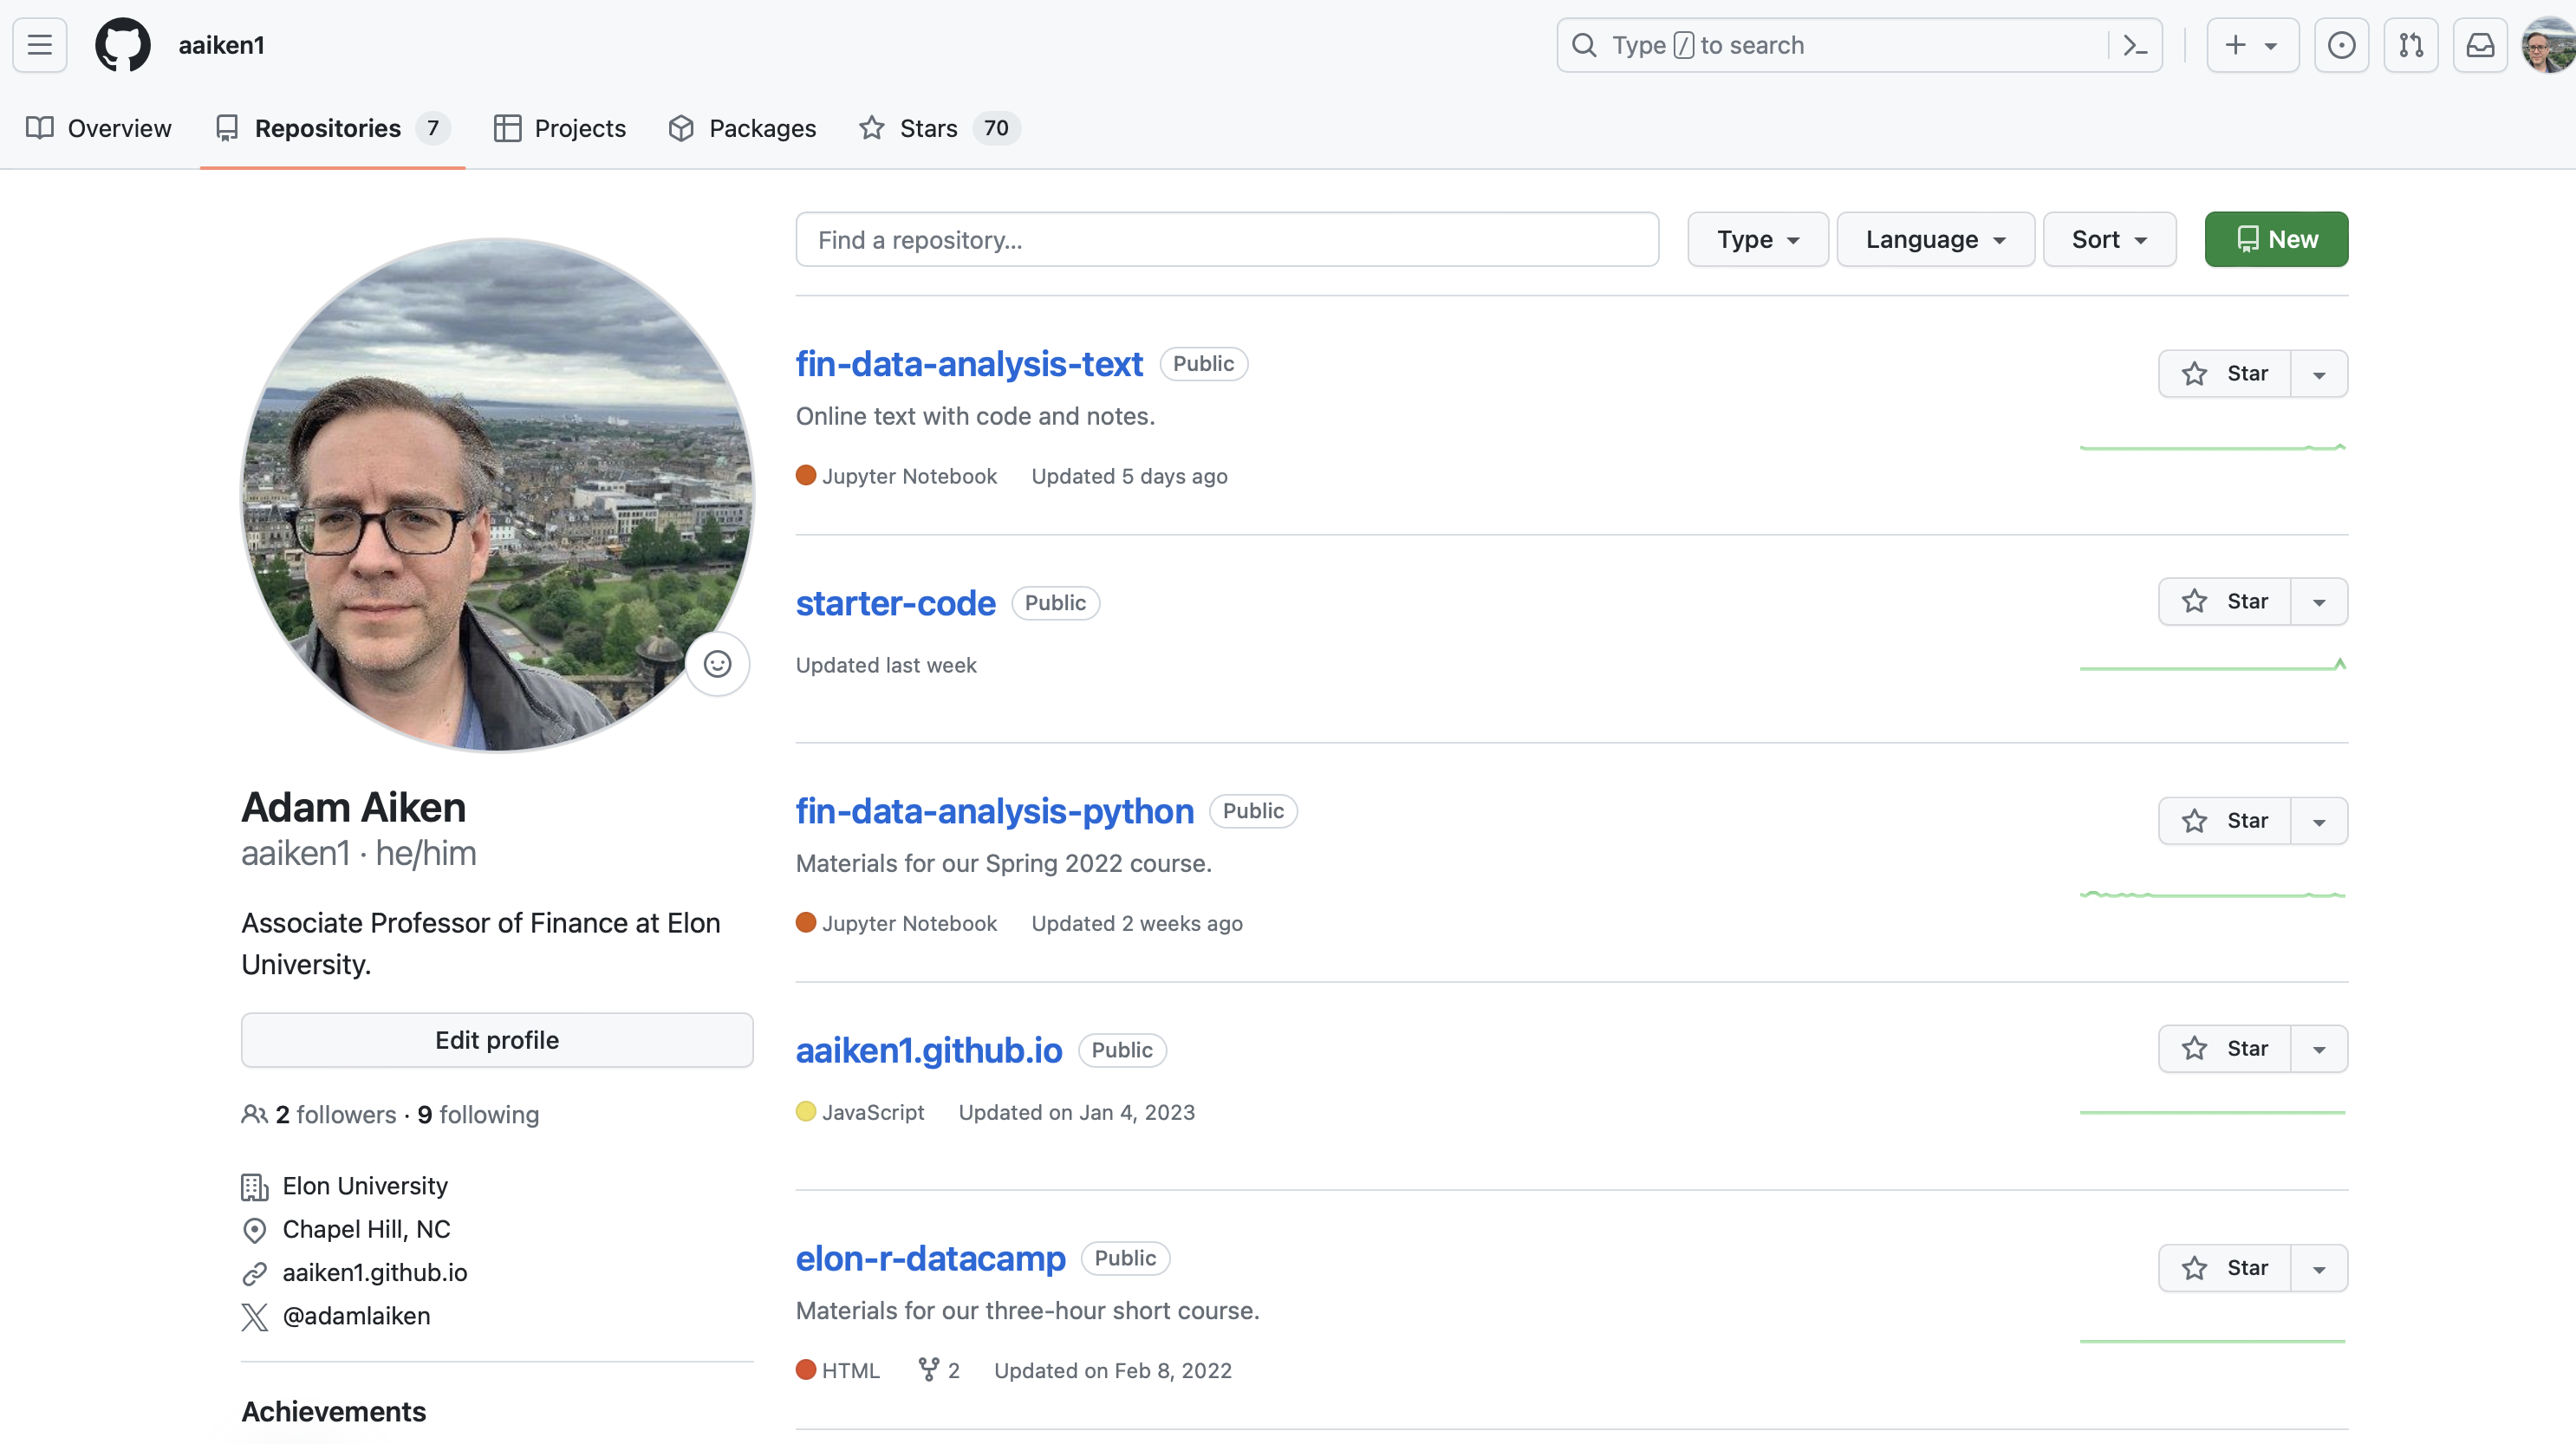
Fig. 2.12 Click the green, New button in the upper-right to create a new repository.#
Let’s create a general repository (i.e. directory to store files), just for this class. You can name this repository something general and make it private so that others don’t see it on your Github page. Then, this can be your home repository for general coding. Later on, you can even more files into this repository, if you want to save them.
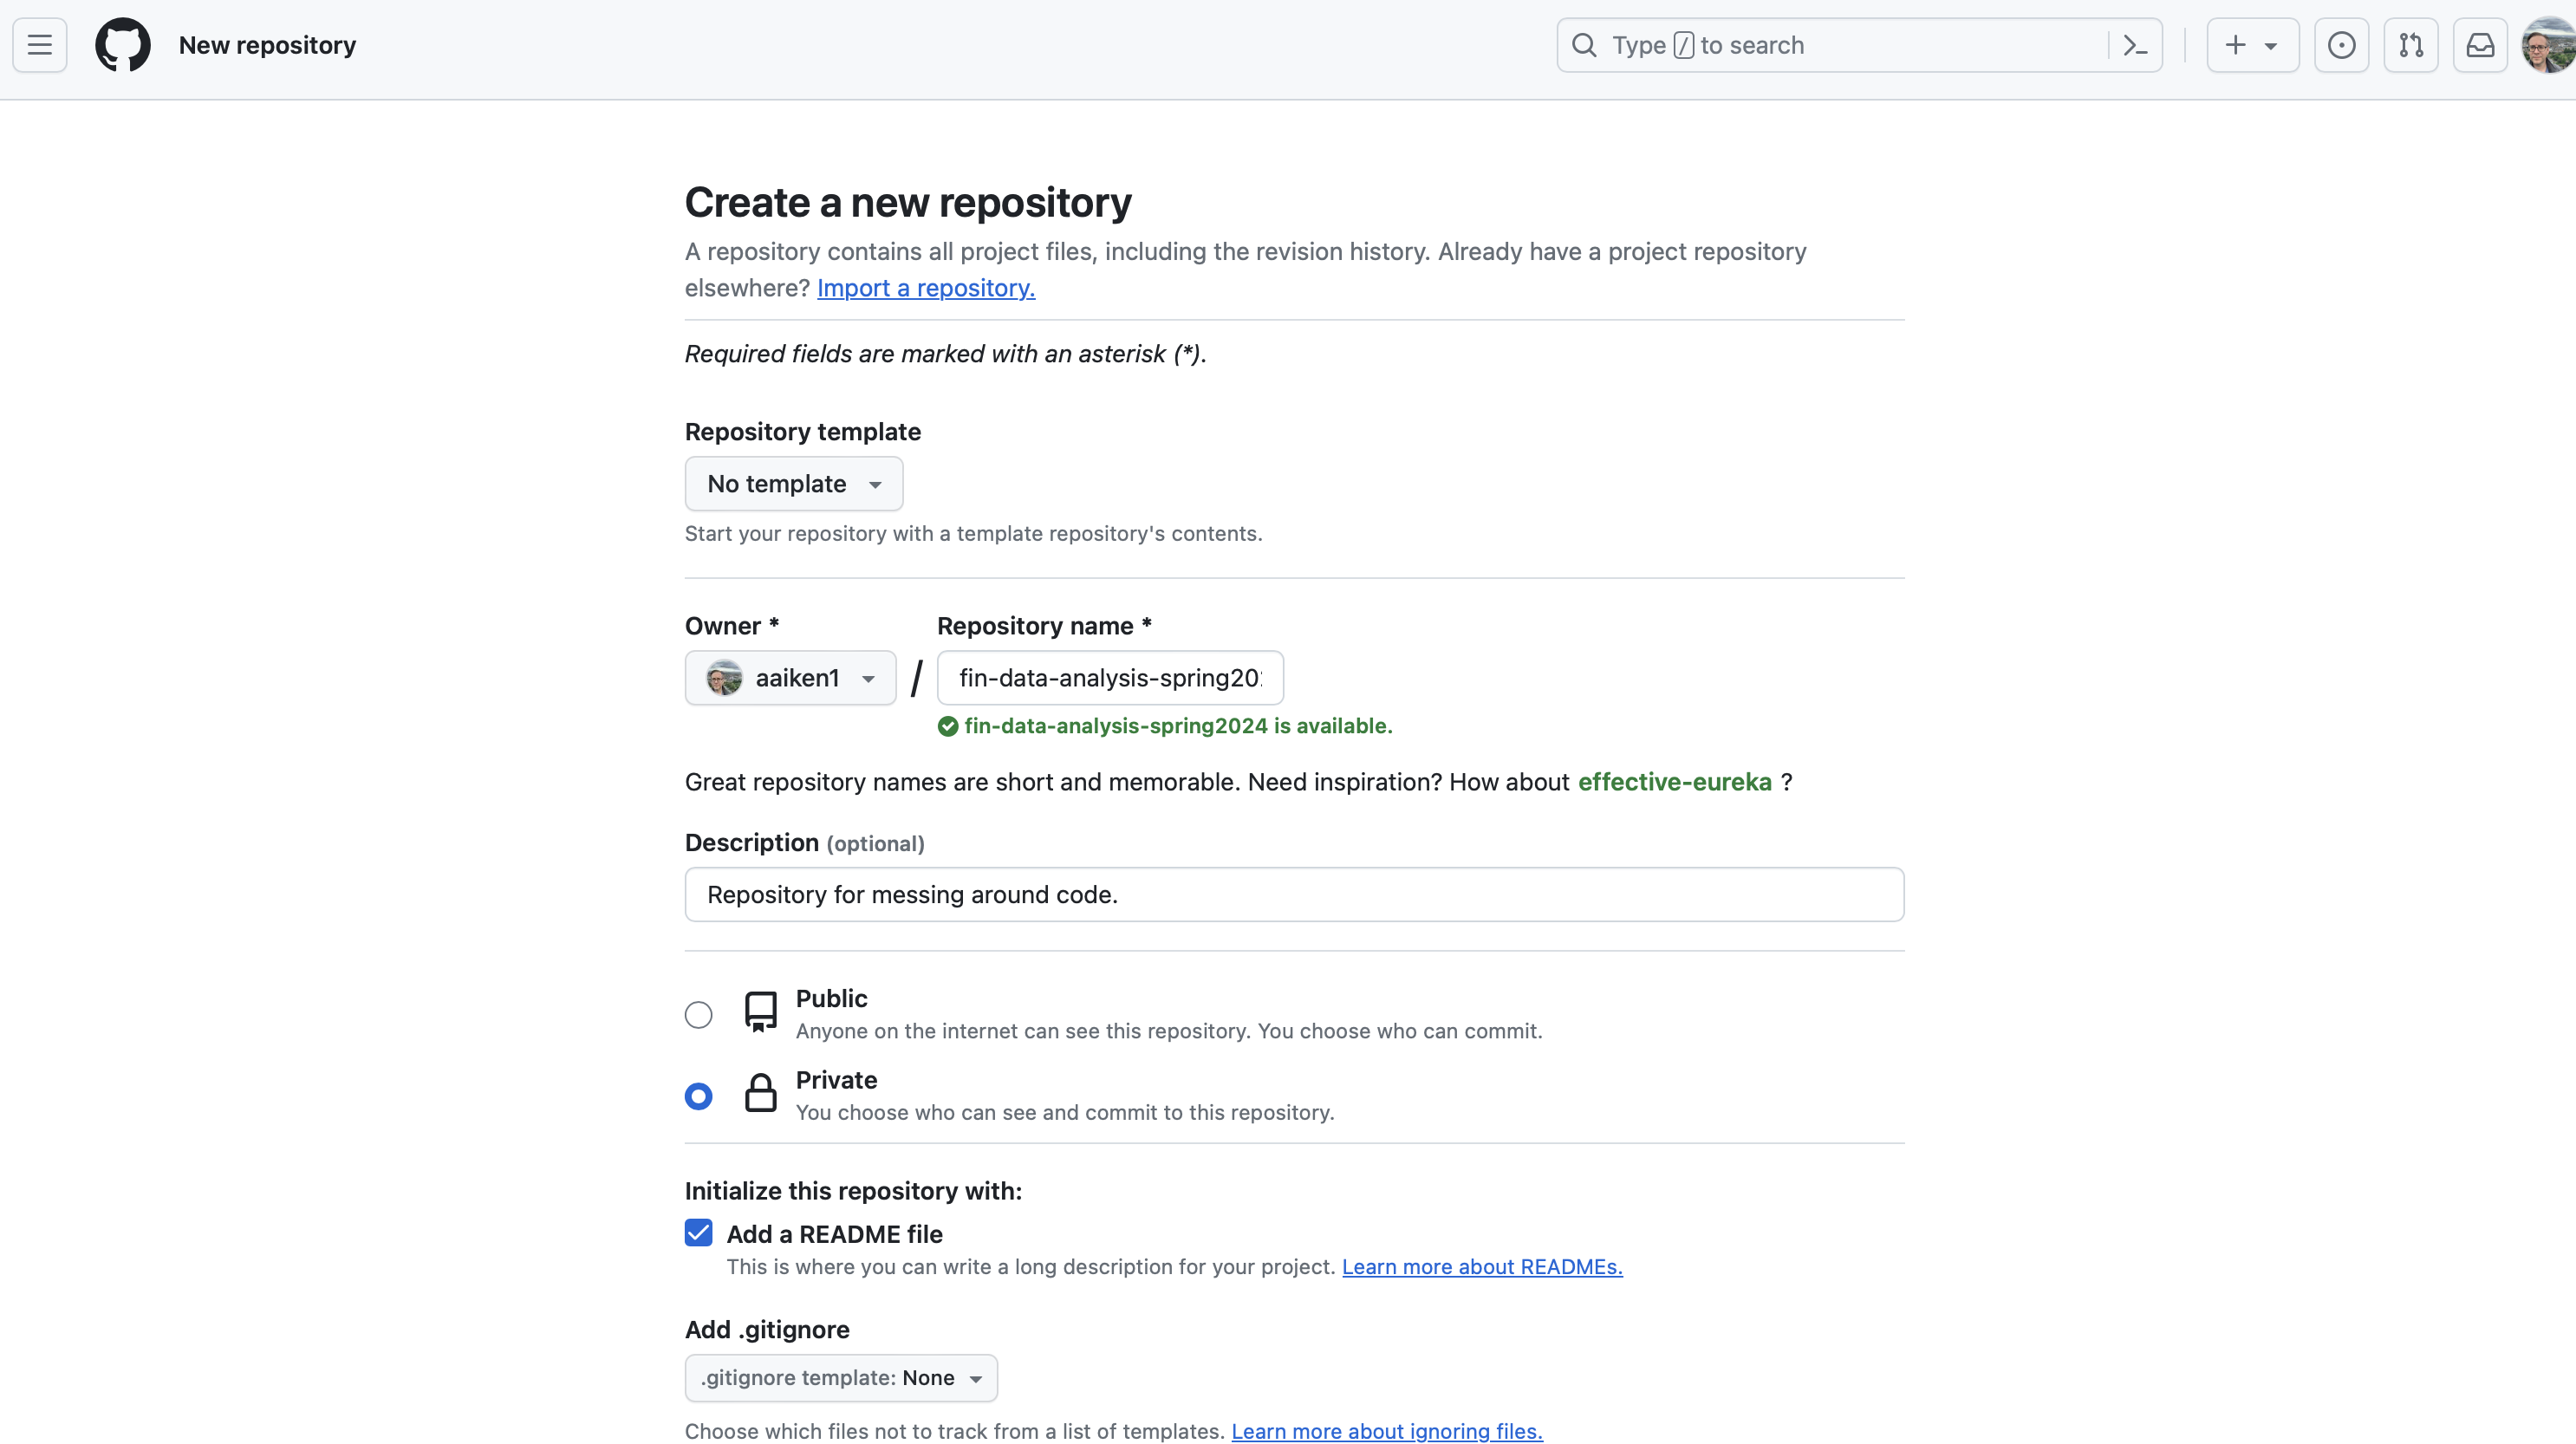
Fig. 2.13 Repositories are essentially directories where you can store files. In this case, you’ll be storing Jupyter notebooks, Python scripts, and data on Github’s servers. You can make local copies of repositories as well.#
Once you’ve created the new repository, it will appear on your Github page. If it is public, everyone can see your files. If it’s private, just you can.
Once you’re done with our course, I recommend creating a public repository to demonstrate some of your work. You can add the link to your LinkedIn profile.
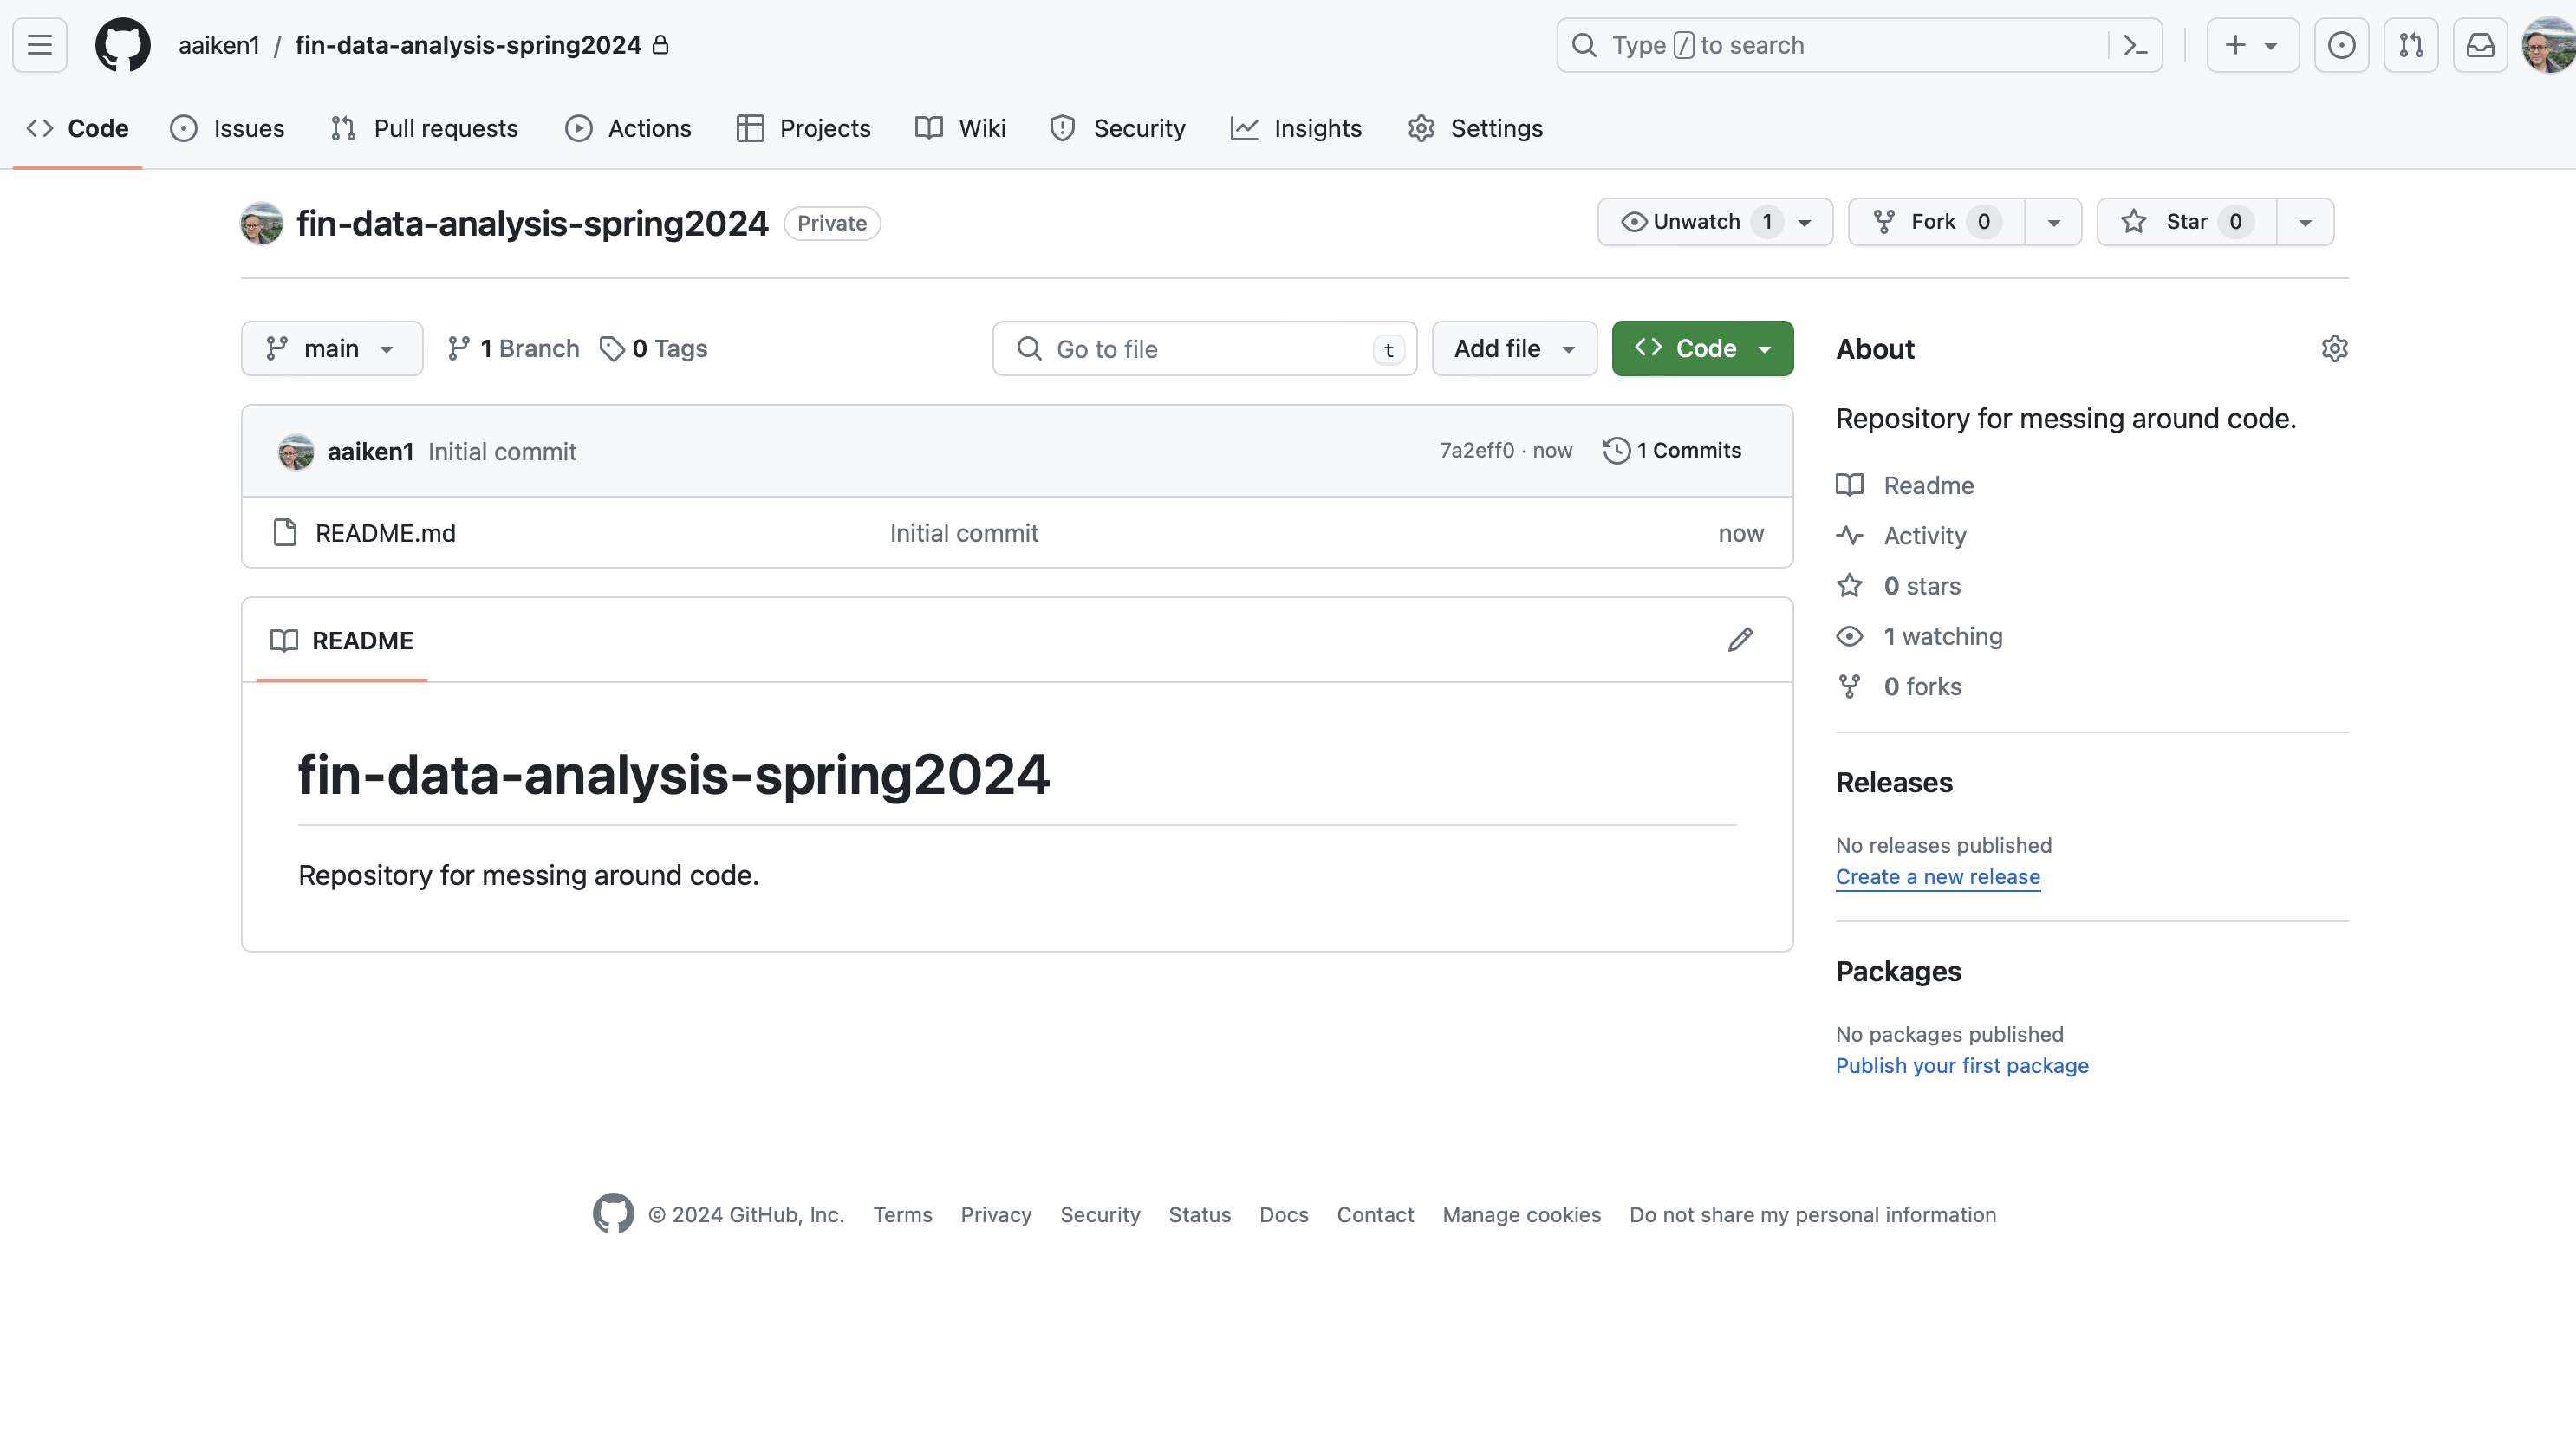
Fig. 2.14 When you create a new Codespace, you’ll get your new repository as an option.#
2.2.5. How to update an assignment#
I will sometimes (often?) update an assignment after you have accepted it. You won’t know this, though, just working in your Codespace.
First, do a git add/commit/push on the files that you are working on. Get them into your repo for the assignment.
Next, go to your Github page for a lab - the repo that has your name at the end. You’ll see a message at the top that you are “Y commits ahead, X commits behind” if I’ve updated the Readme.md file with the lab instructions.
Click on behind to see the changes to the assignment, side-by-side with original assignment.
You’ll want the Readme instructions in your forked copy of my main repo to reflect what is now in the main repo. You want to Synch Fork. Click that button at the top, under the “X commits behind” message.
Click the green Update Branch button.
The file list in the repo should now reflect this update. For example, the commit message next to the Readme.md file should say “Merge branch ‘elon-fin-data:main’ into main”.
Go back to your Codespace for this assignment and repo. Click on the Source Control button on the right. Do you see the blue Synch Changes button with a down arrow now? Click that to bring the update files down into your Codespace.